Shopify App Setup Guide
This guide walks you through creating a Shopify app, installing VesuvioPay, and configuring your theme and checkout settings to enable VesuvioPay on your Shopify store.
1. Create App
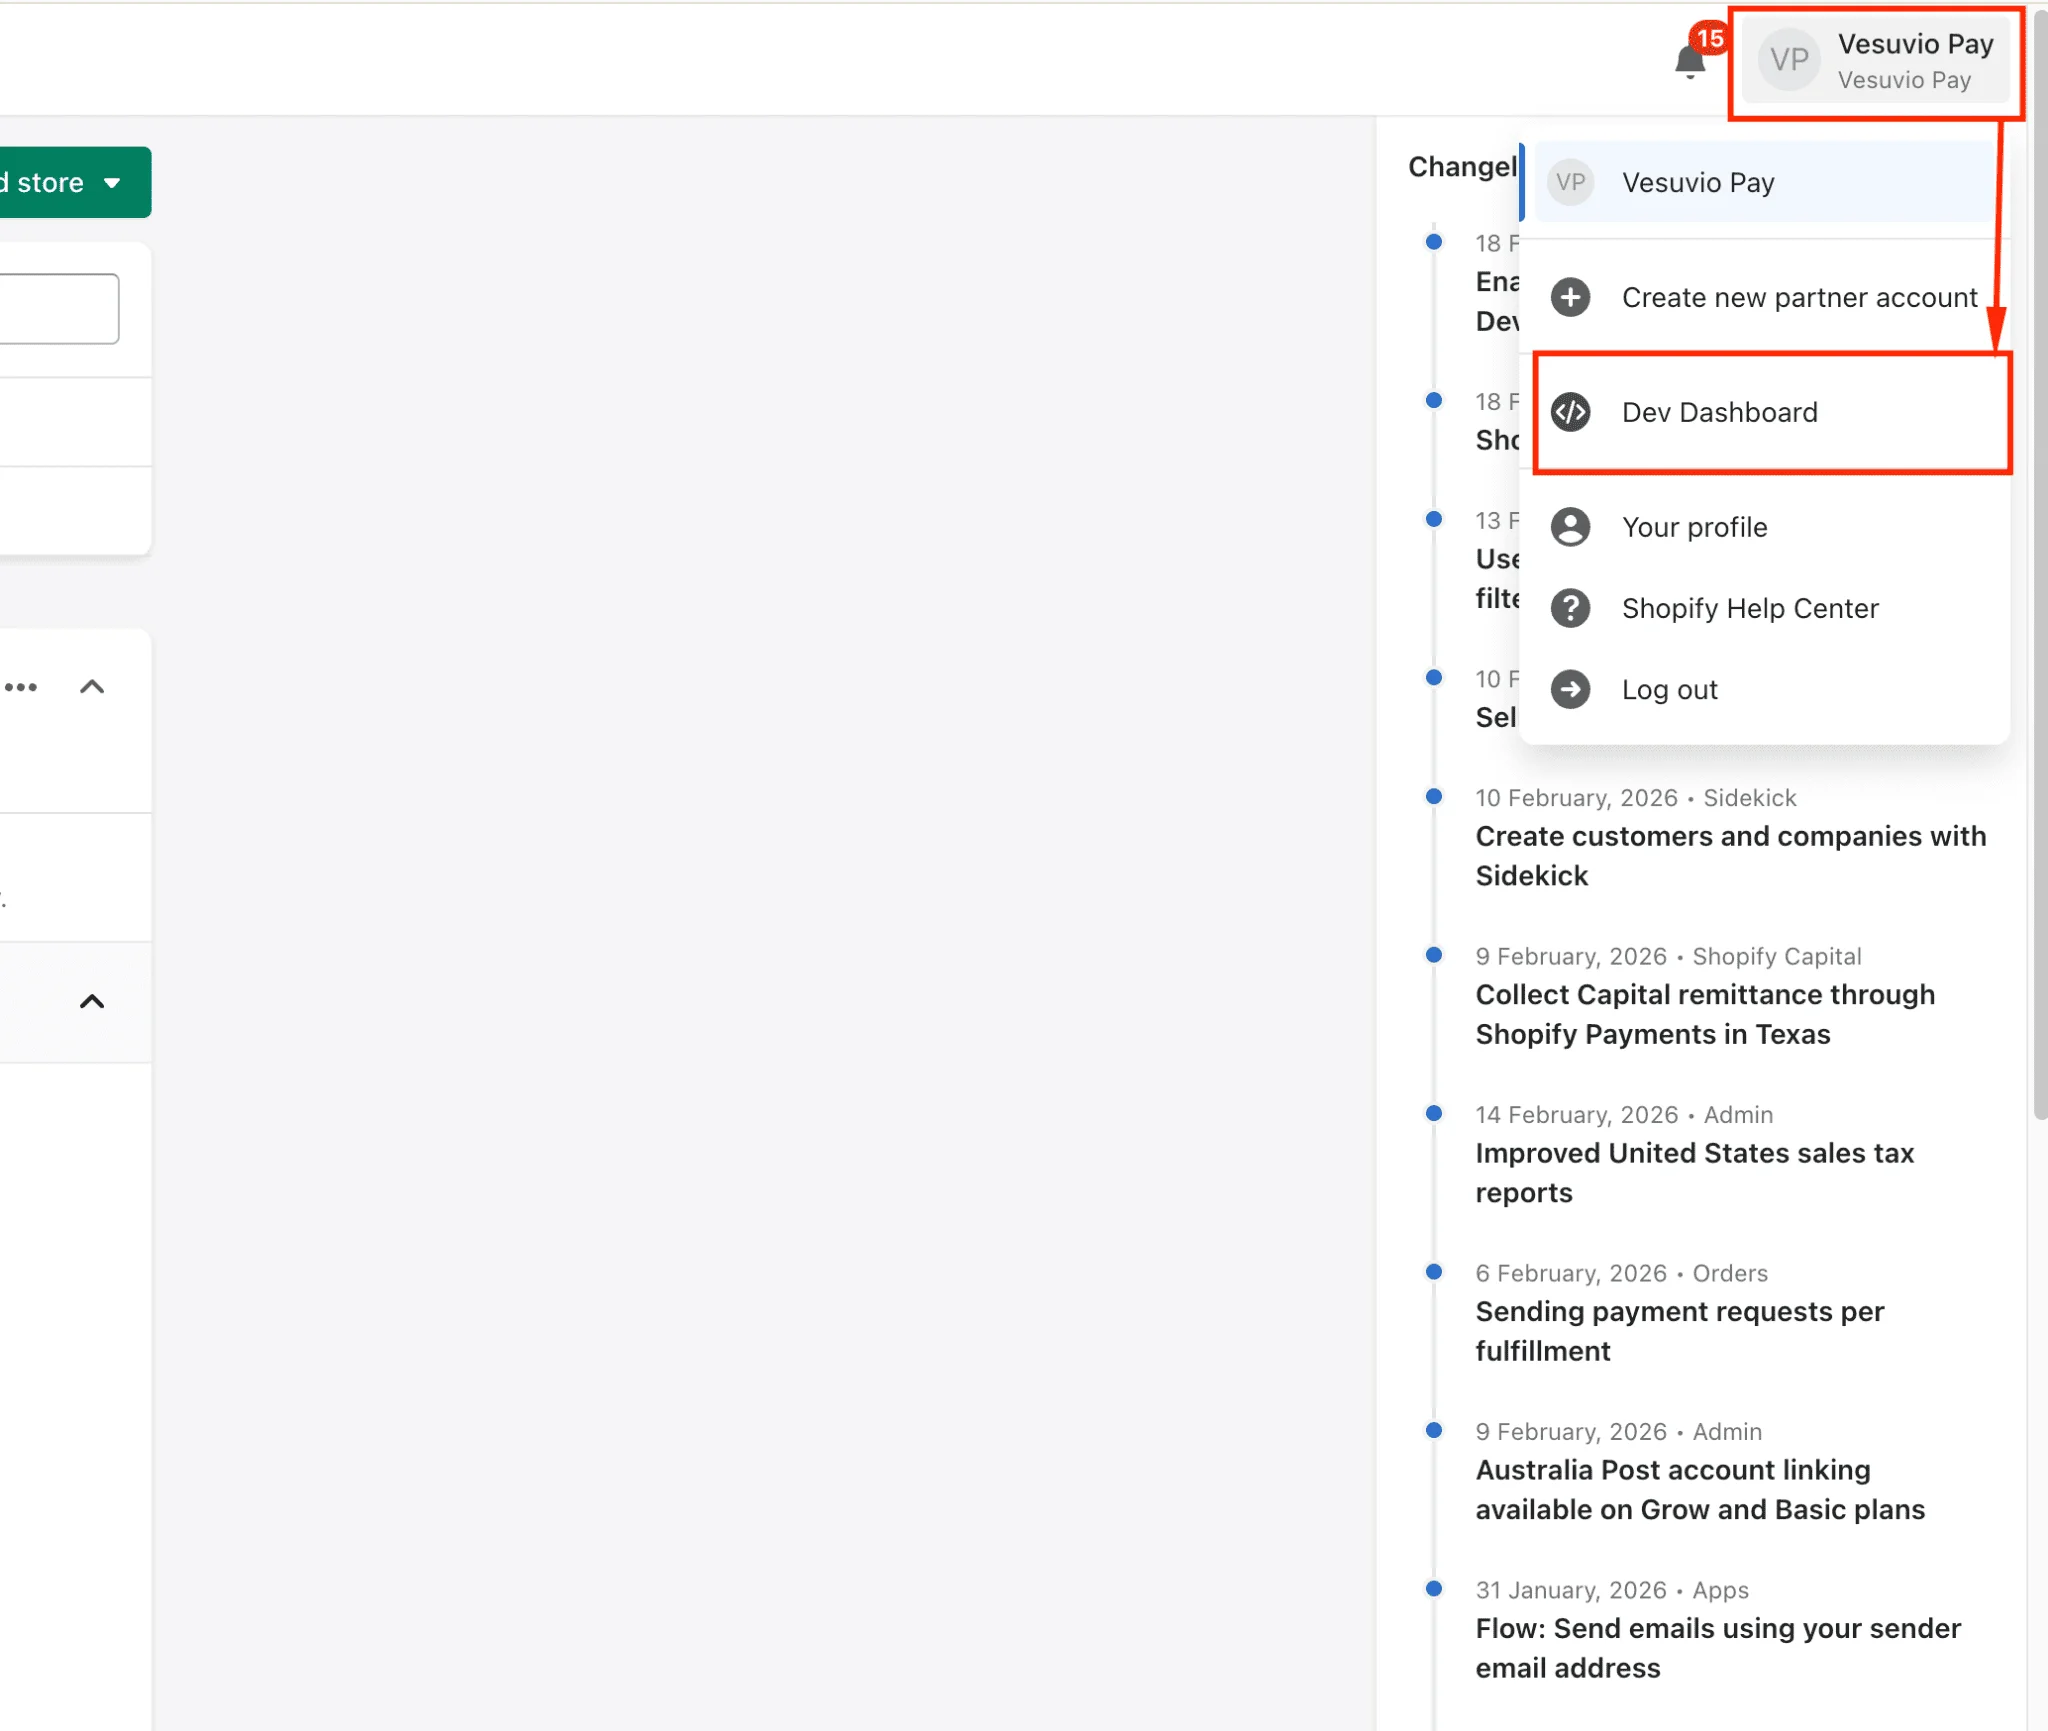
To create the Vesuvio app, navigate to your Shopify Partners account. In the top-right corner, click on your account name and switch to the Shopify Dev Dashboard.
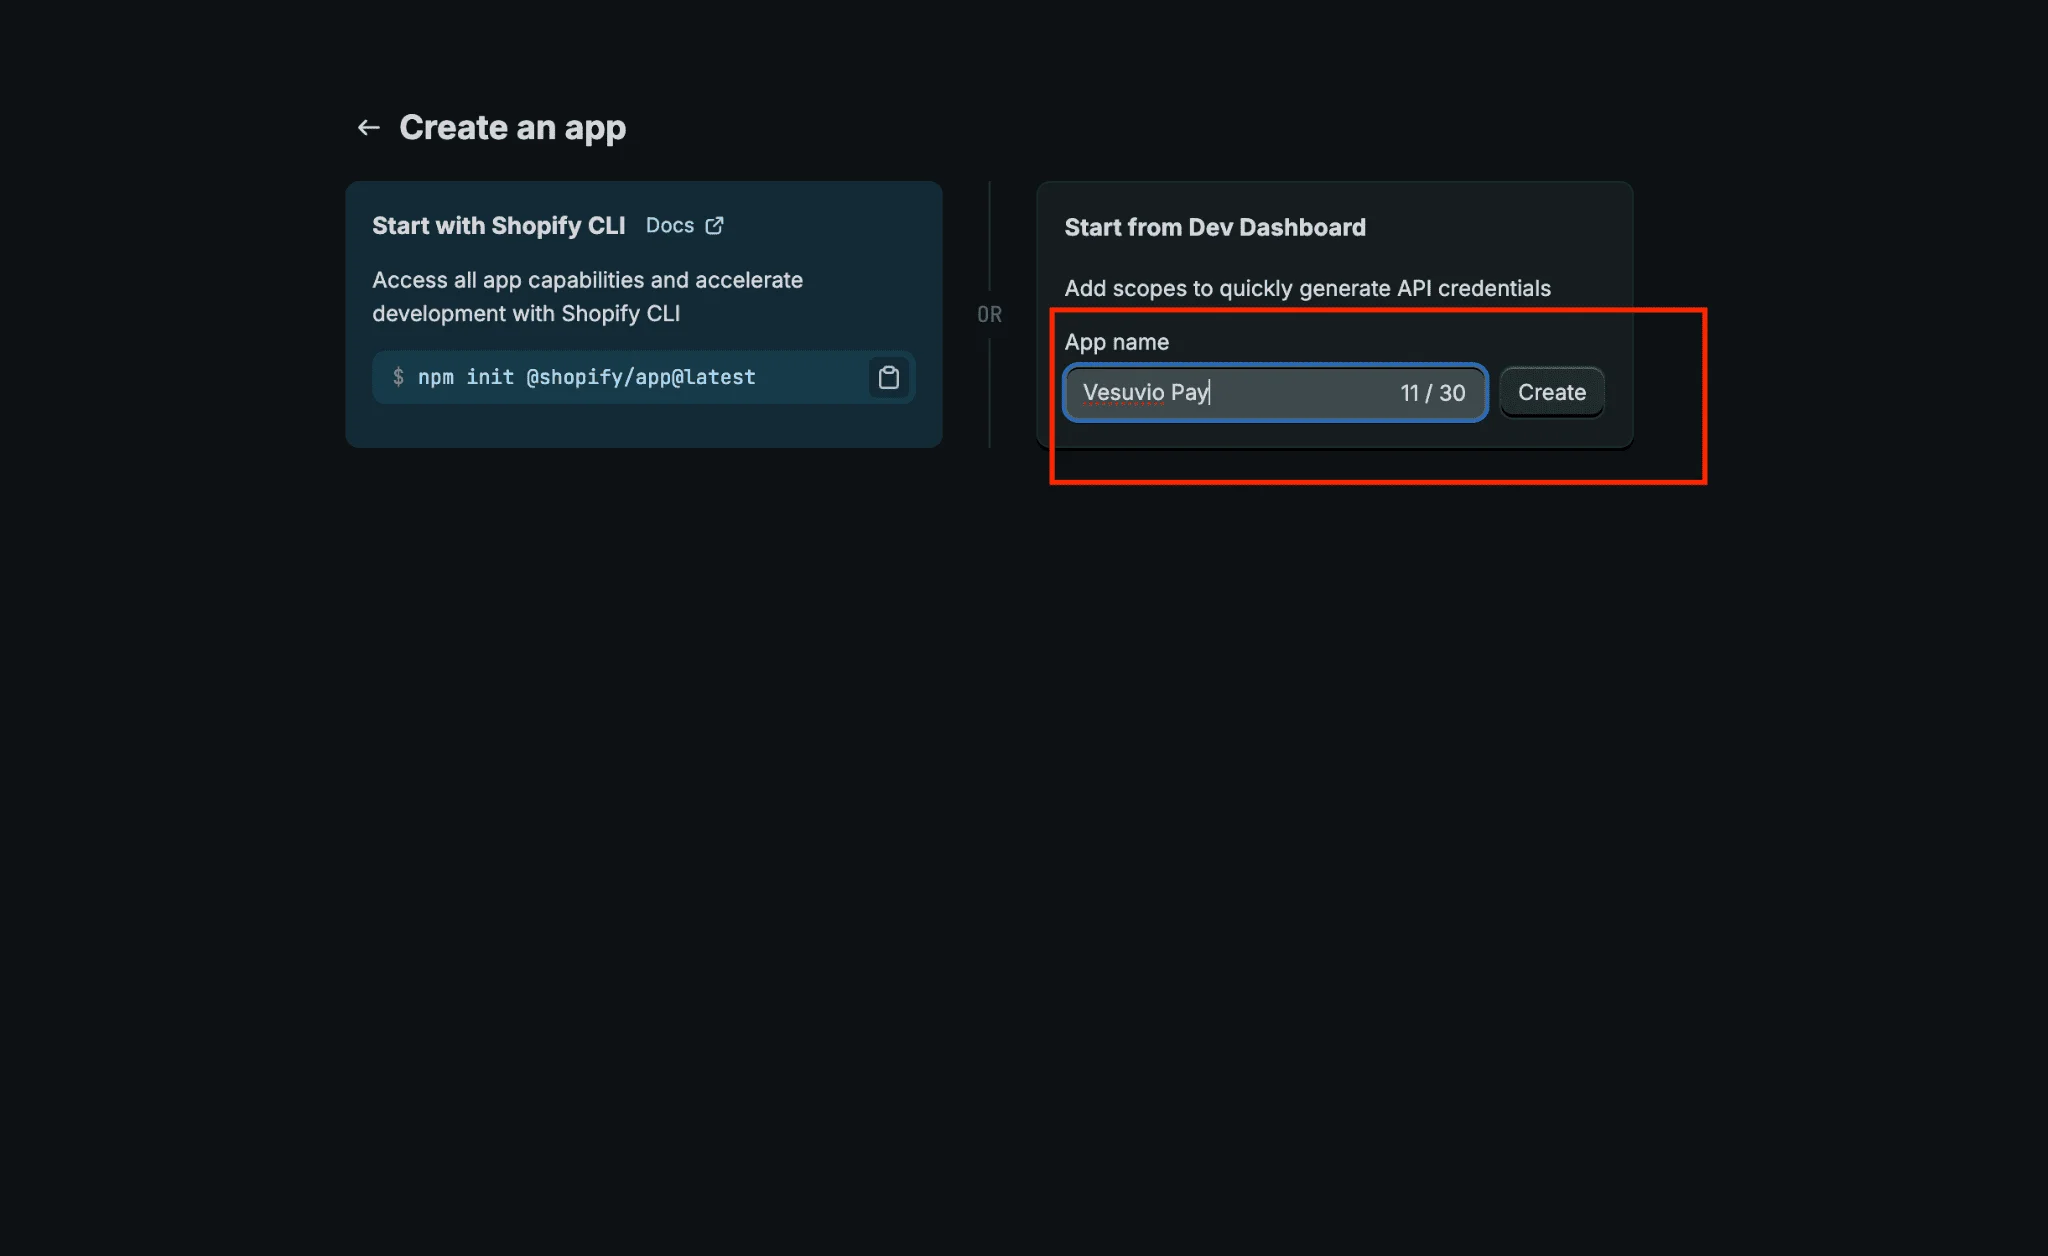
On the Dev Dashboard, click Create app.

Enter your app name (for example, "Vesuvio Pay") and click the Create button.
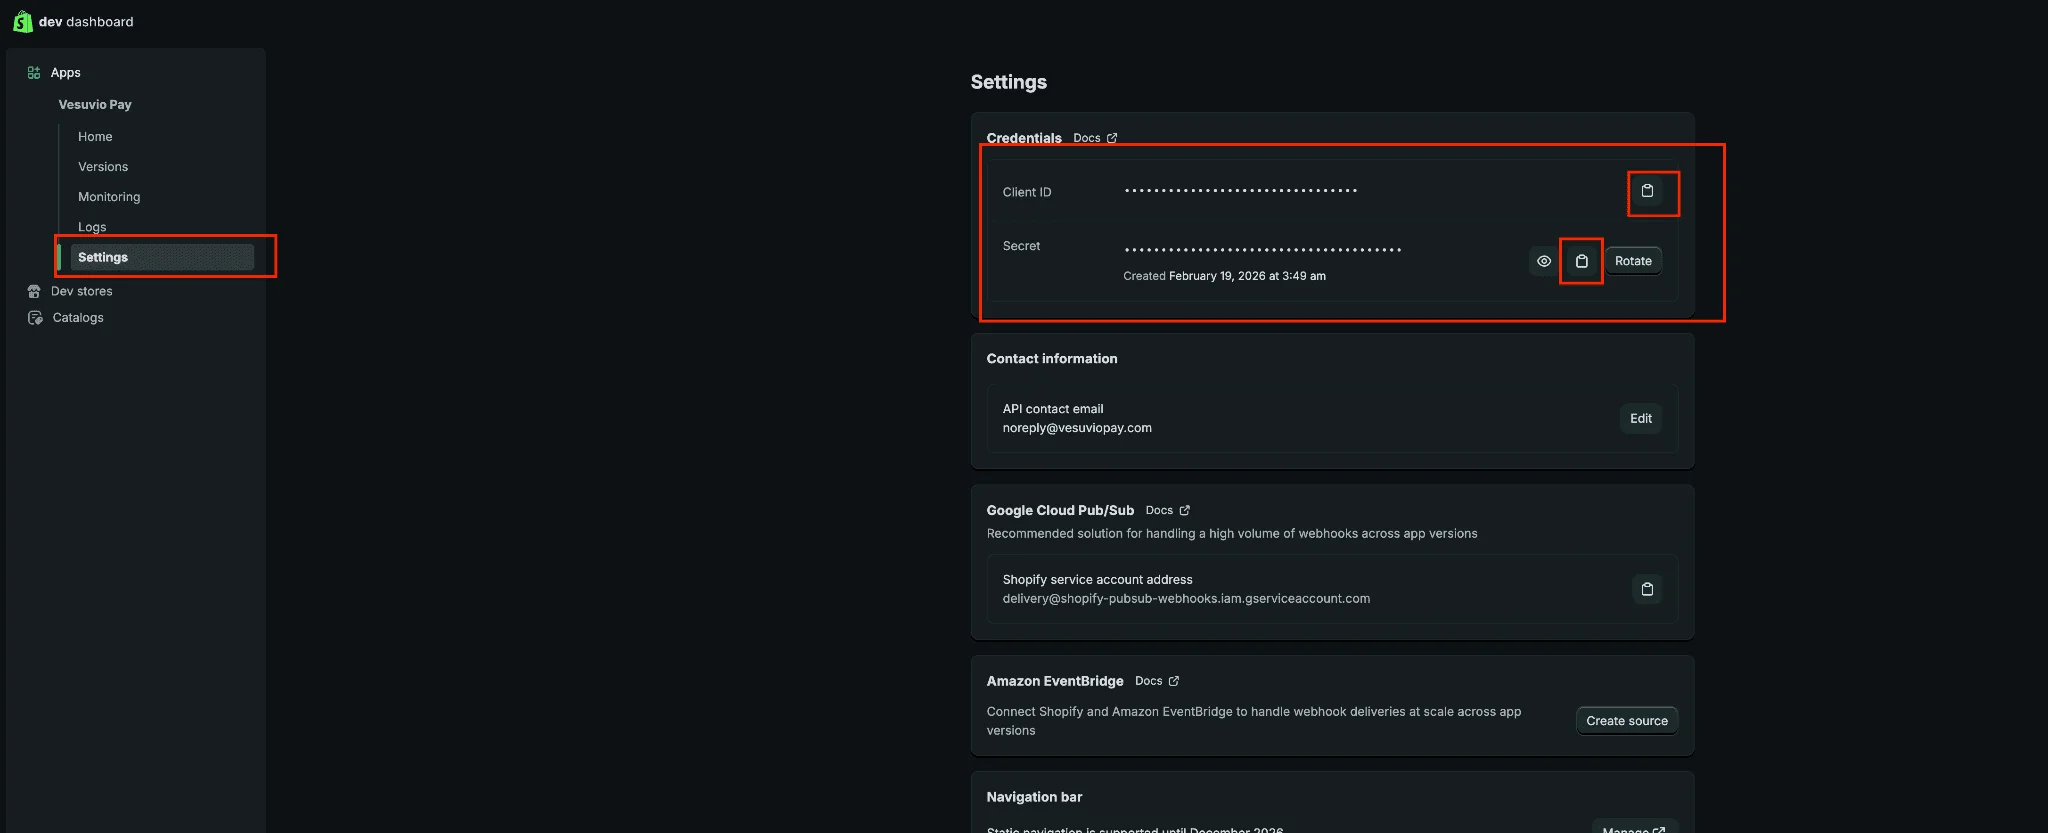
After creating the app, go to Settings and copy both the Client ID and Client Secret. Paste these into your VesuvioPay Dashboard.
2. Get Shopify CLI Token
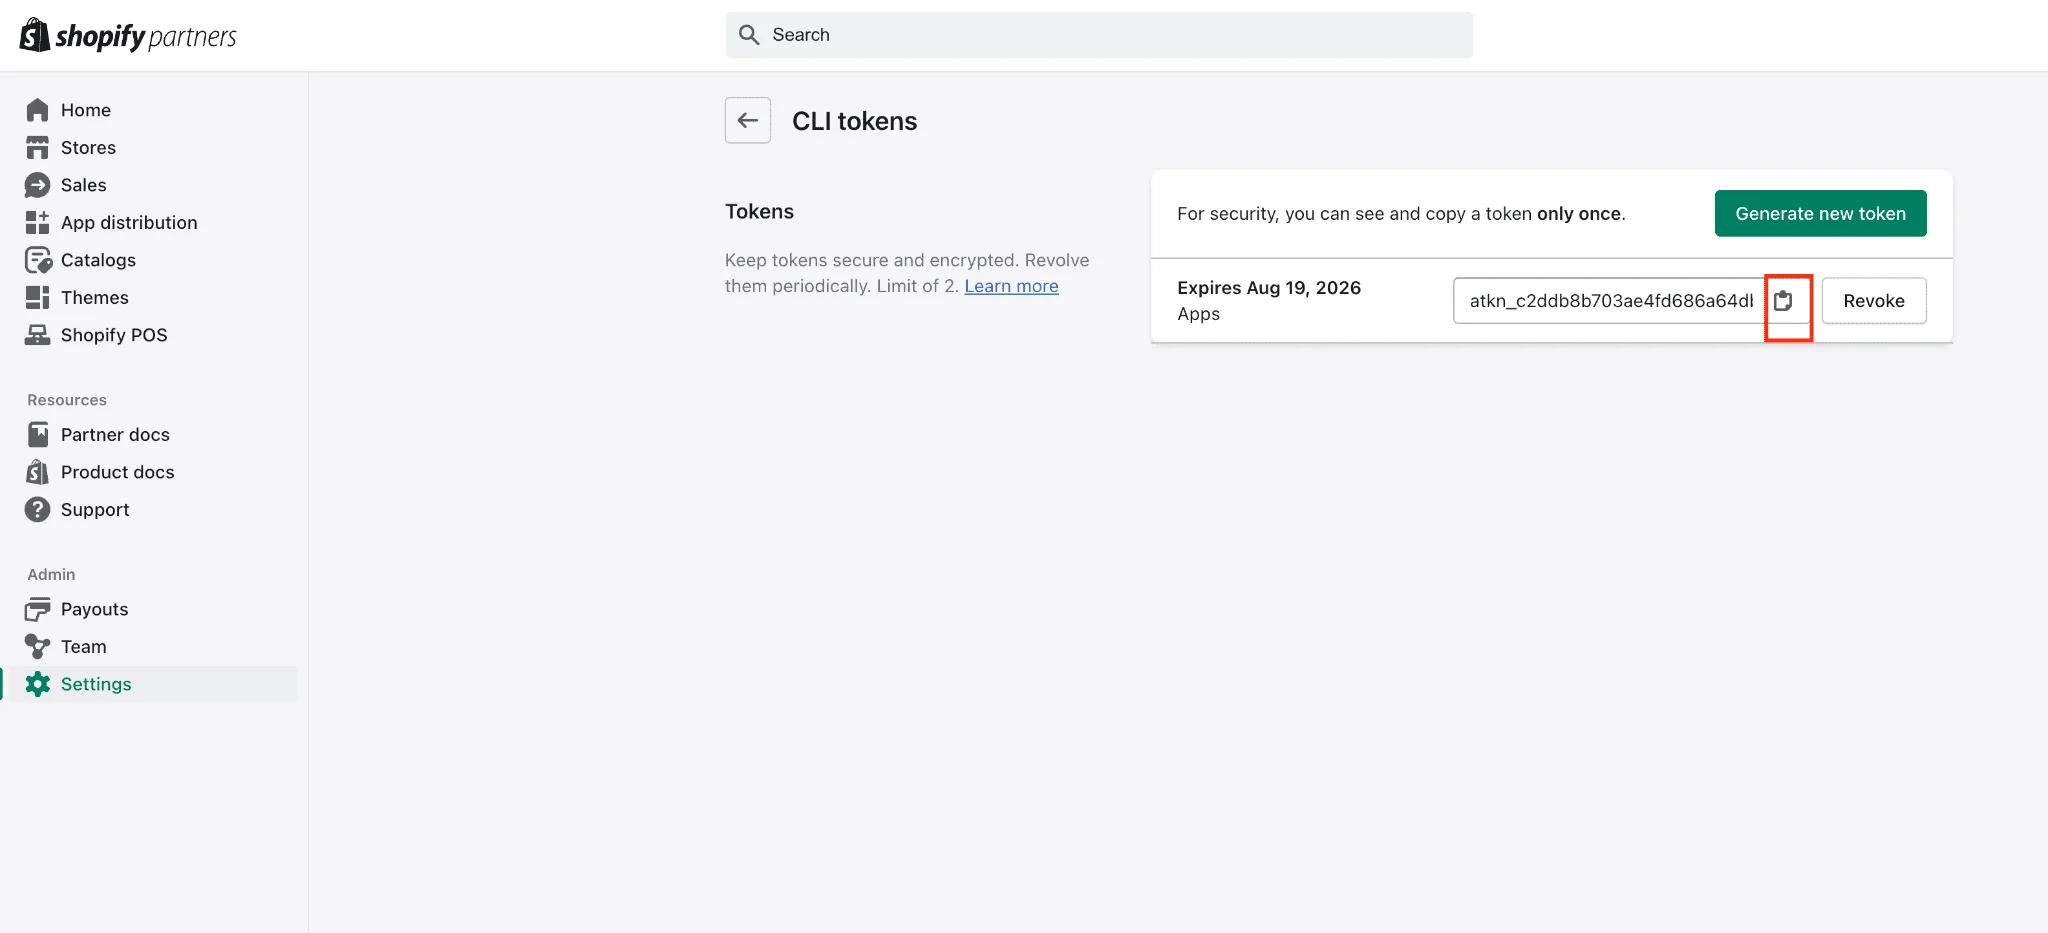
You can only copy a CLI token immediately after creating it. If you refresh the page, the copy option will no longer be available.
This token is required to deploy VesuvioPay extensions to the app you just created. The CLI token must be from the same account as the newly created Vesuvio app.
Go to your Shopify Partners → Settings.
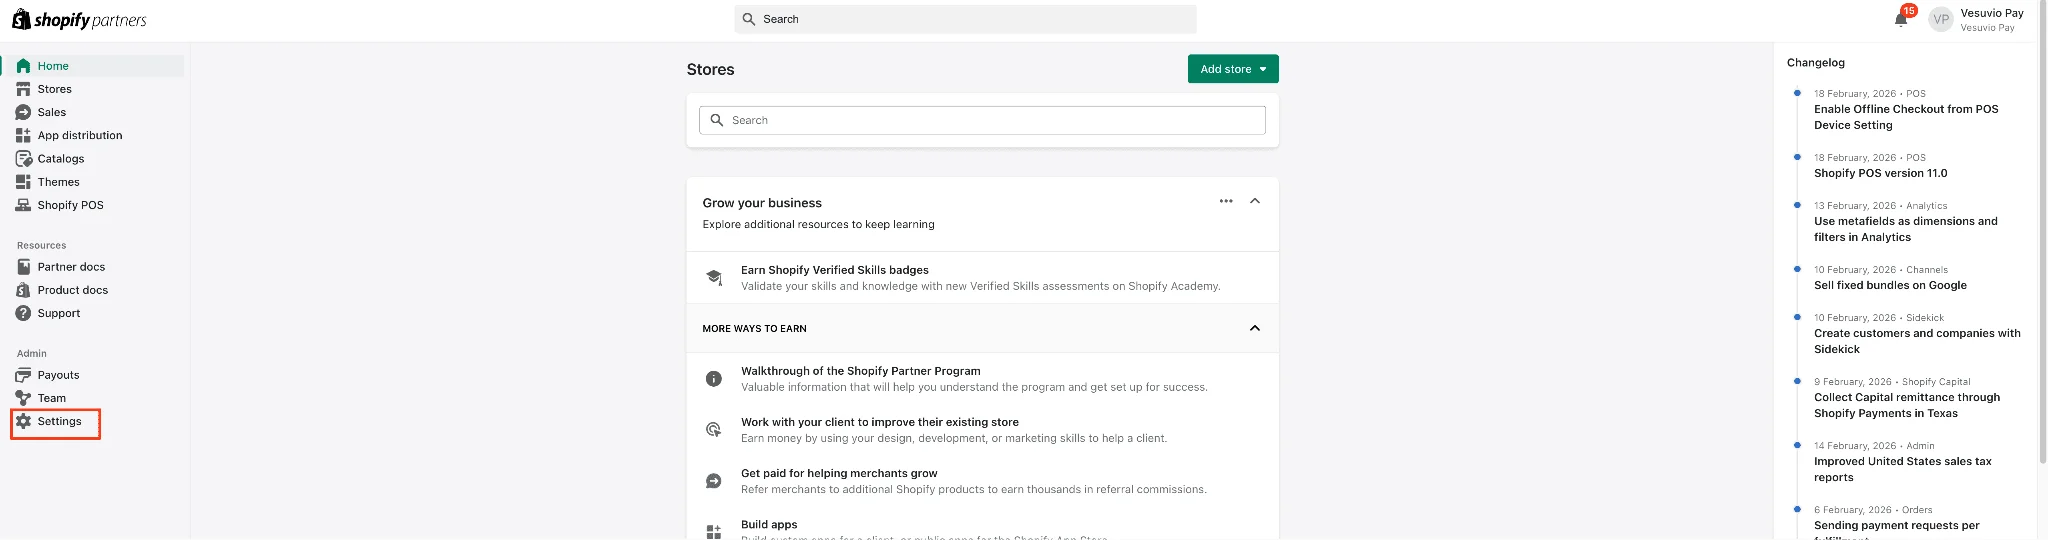
Scroll to the bottom of the page and click the Manage CLI tokens button.

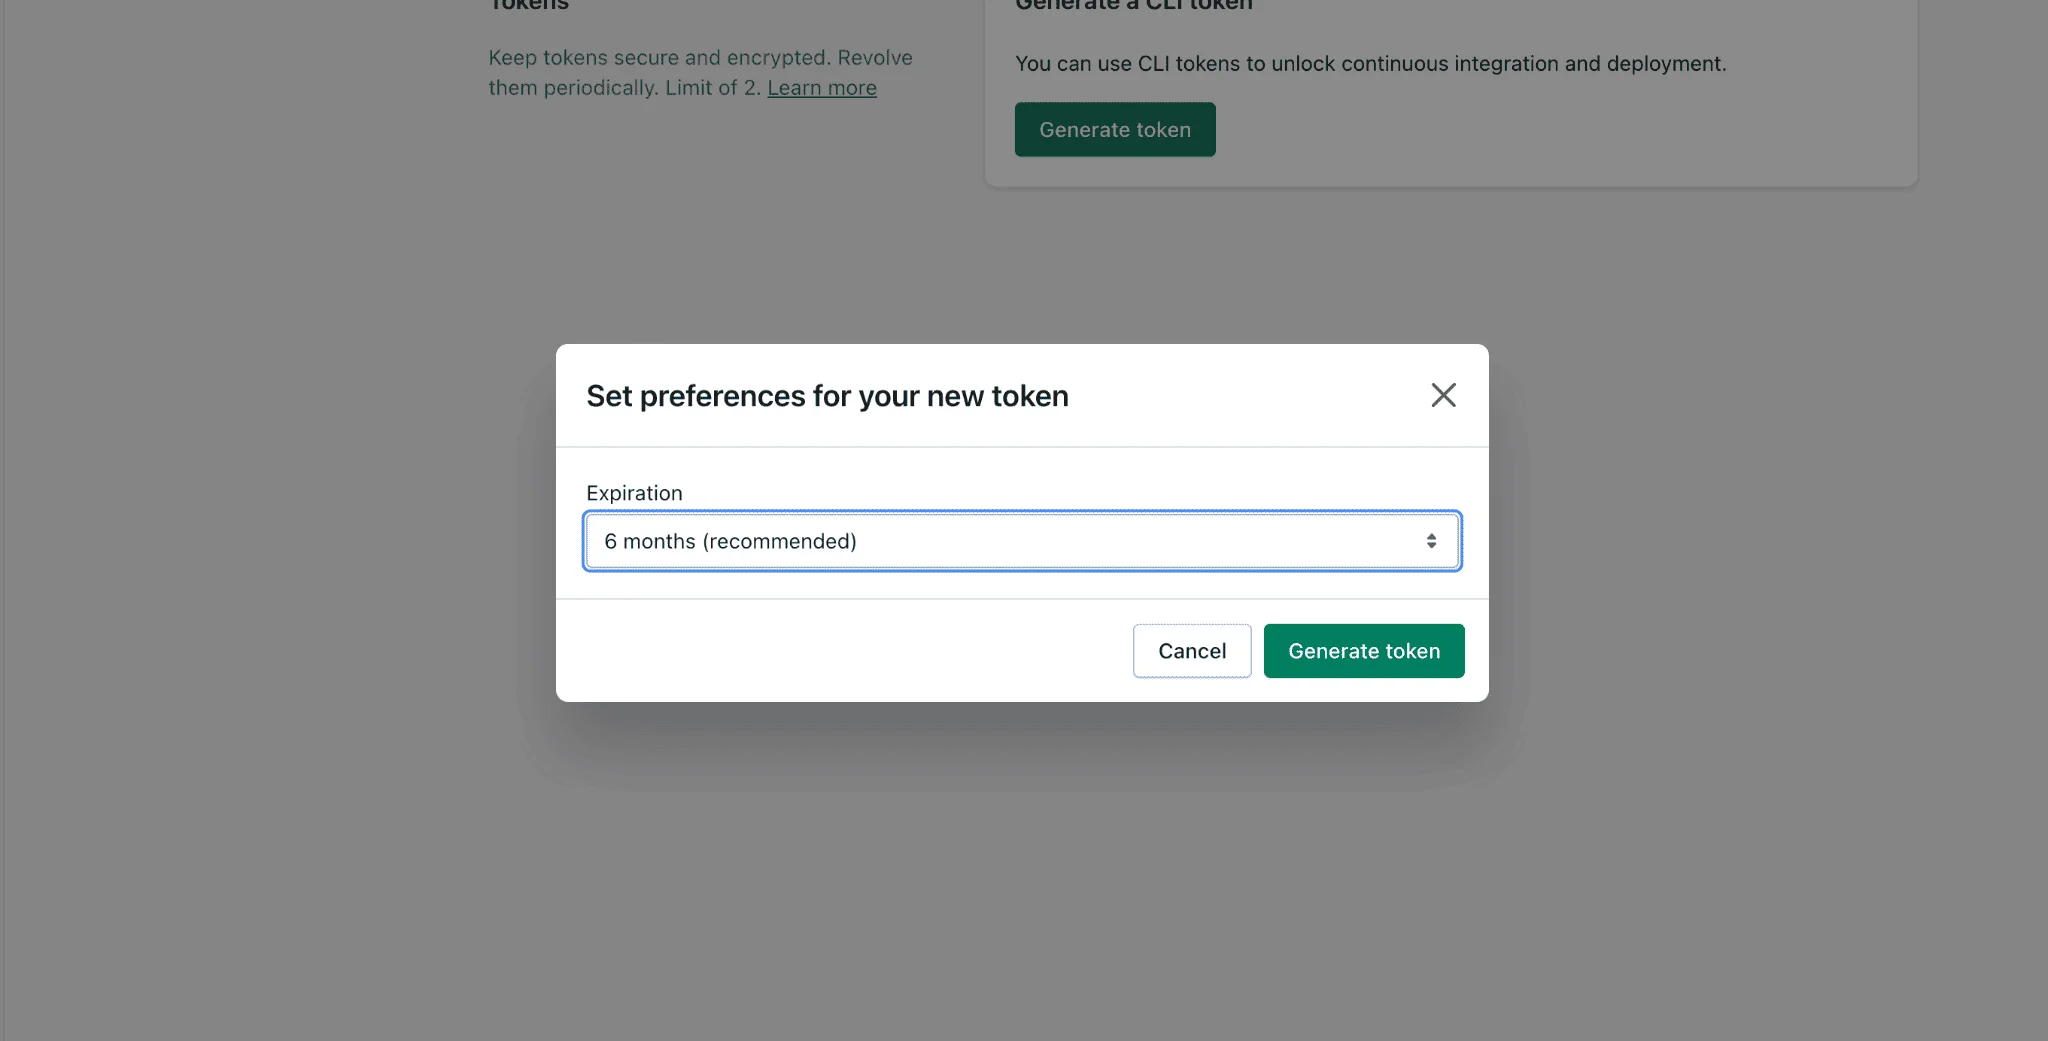
Click Generate token.

In the confirmation modal, click Generate token.
Click Copy token and paste it into the VesuvioPay Dashboard.
3. Install the App
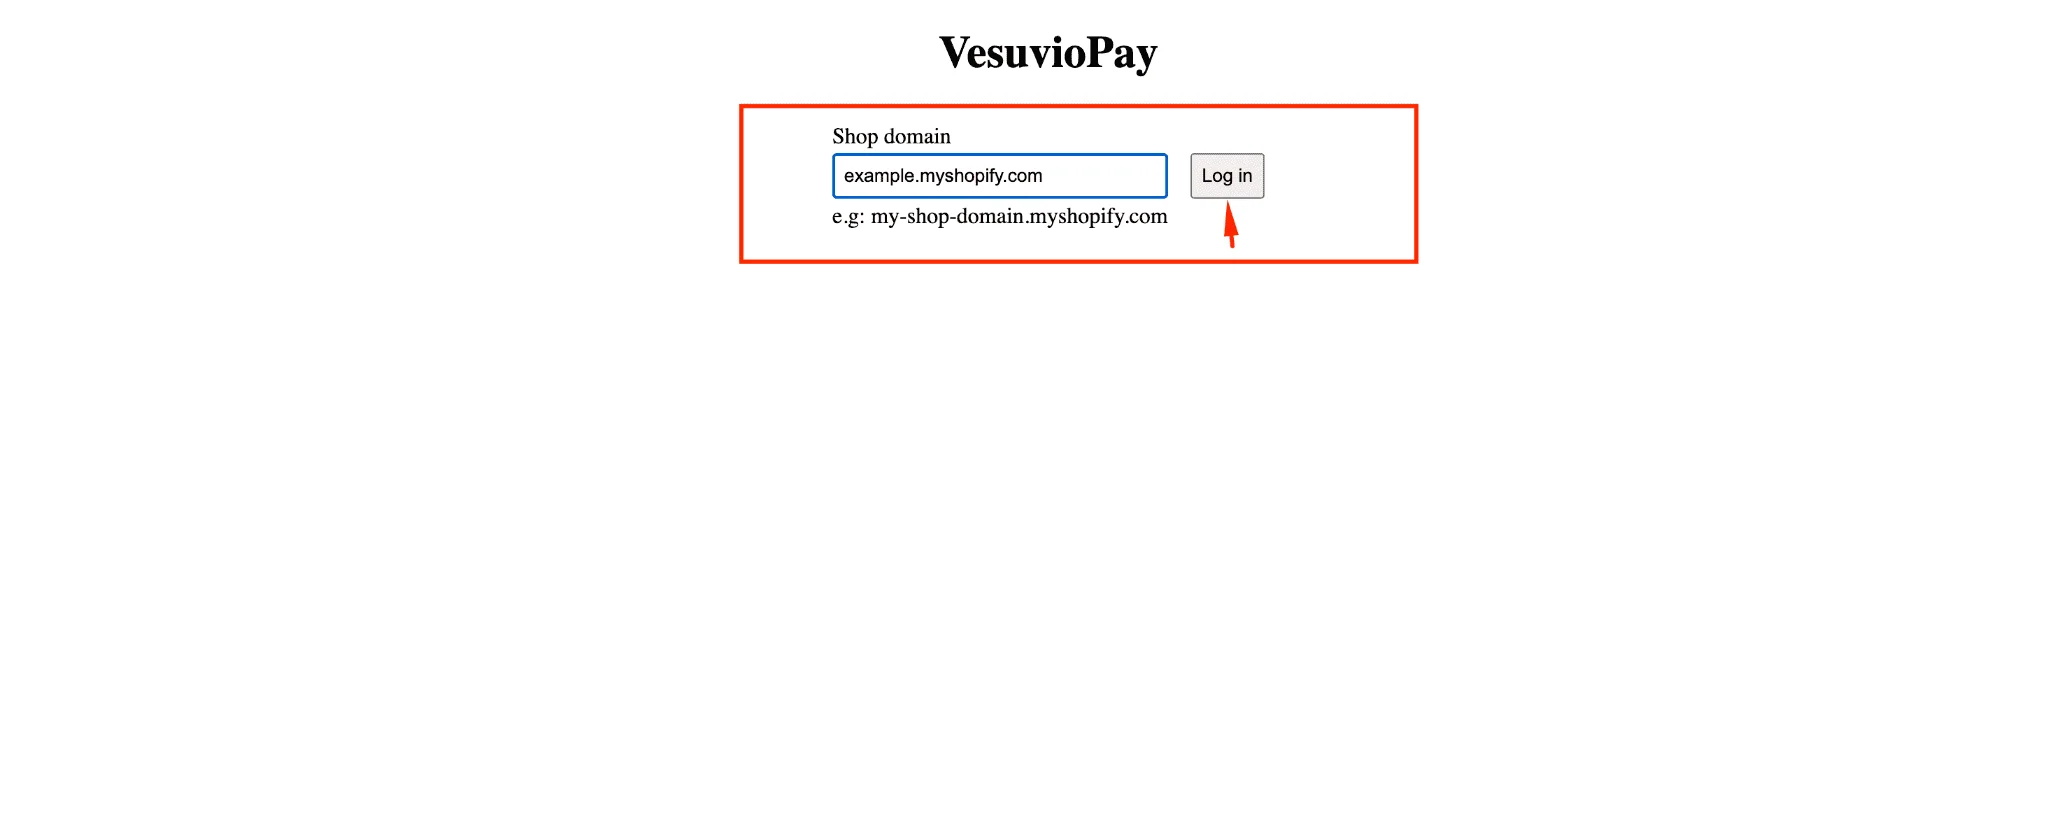
To install the VesuvioPay Shopify app, navigate to https://store.vesuviopay.com/, enter your .myshopify.com store URL, and click the Log in button.
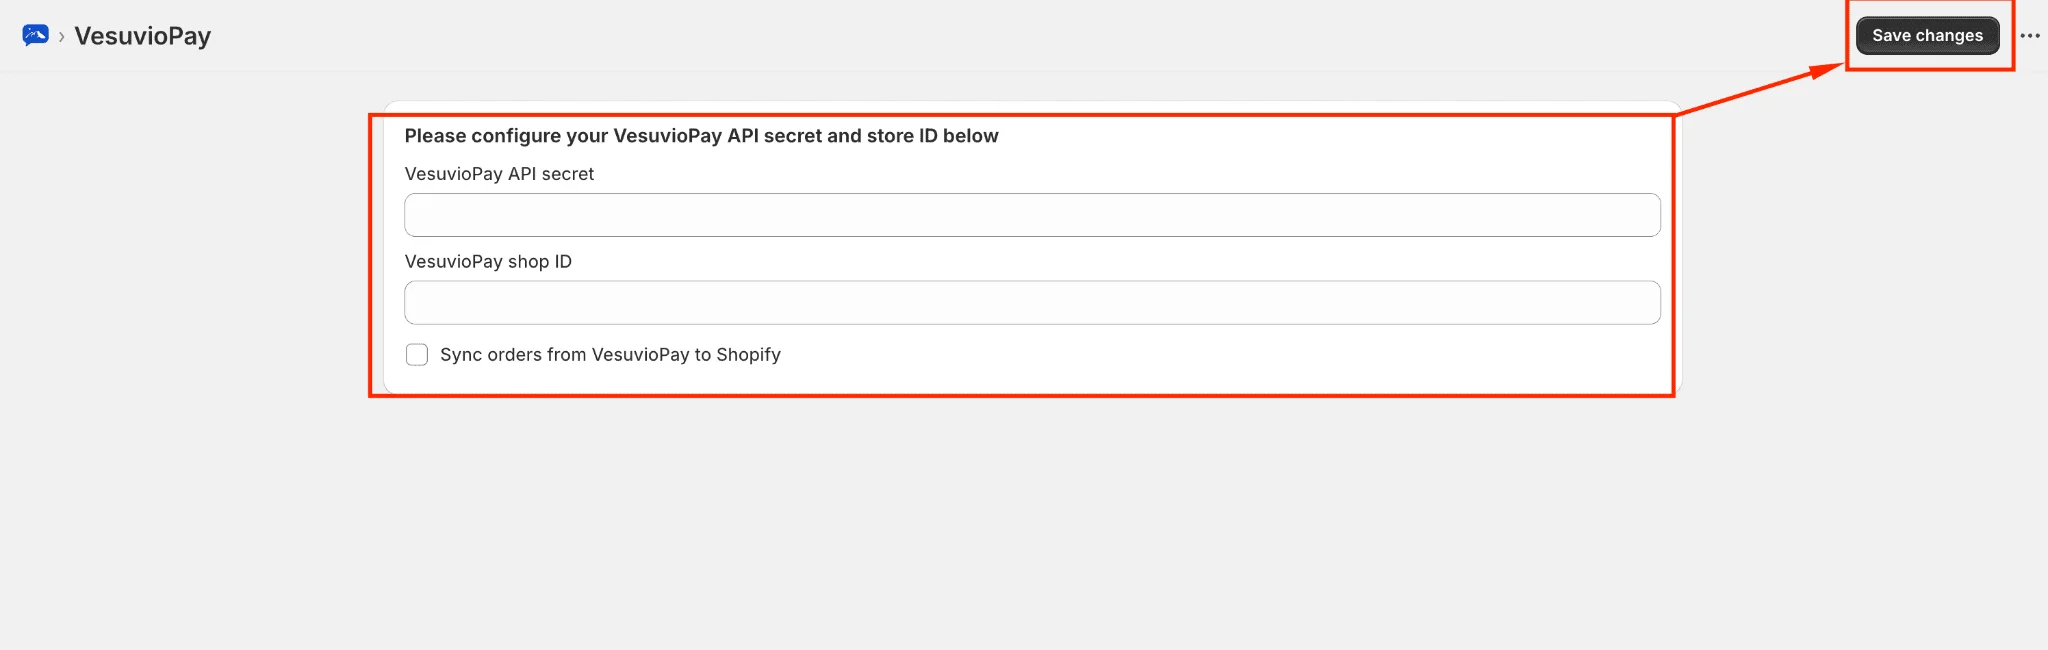
4. Configure App Settings
After installing the app, you will be redirected to Shopify Admin on the app's home page. Fill in the following fields:
- Vesuvio API Secret
- Vesuvio Shop ID
You can find your Shop ID and API Secret on the VesuvioPay Dashboard. This information is required to synchronize your Shopify products with VesuvioPay and to synchronize orders between both platforms. After clicking Save, VesuvioPay will automatically begin synchronizing your Shopify products.
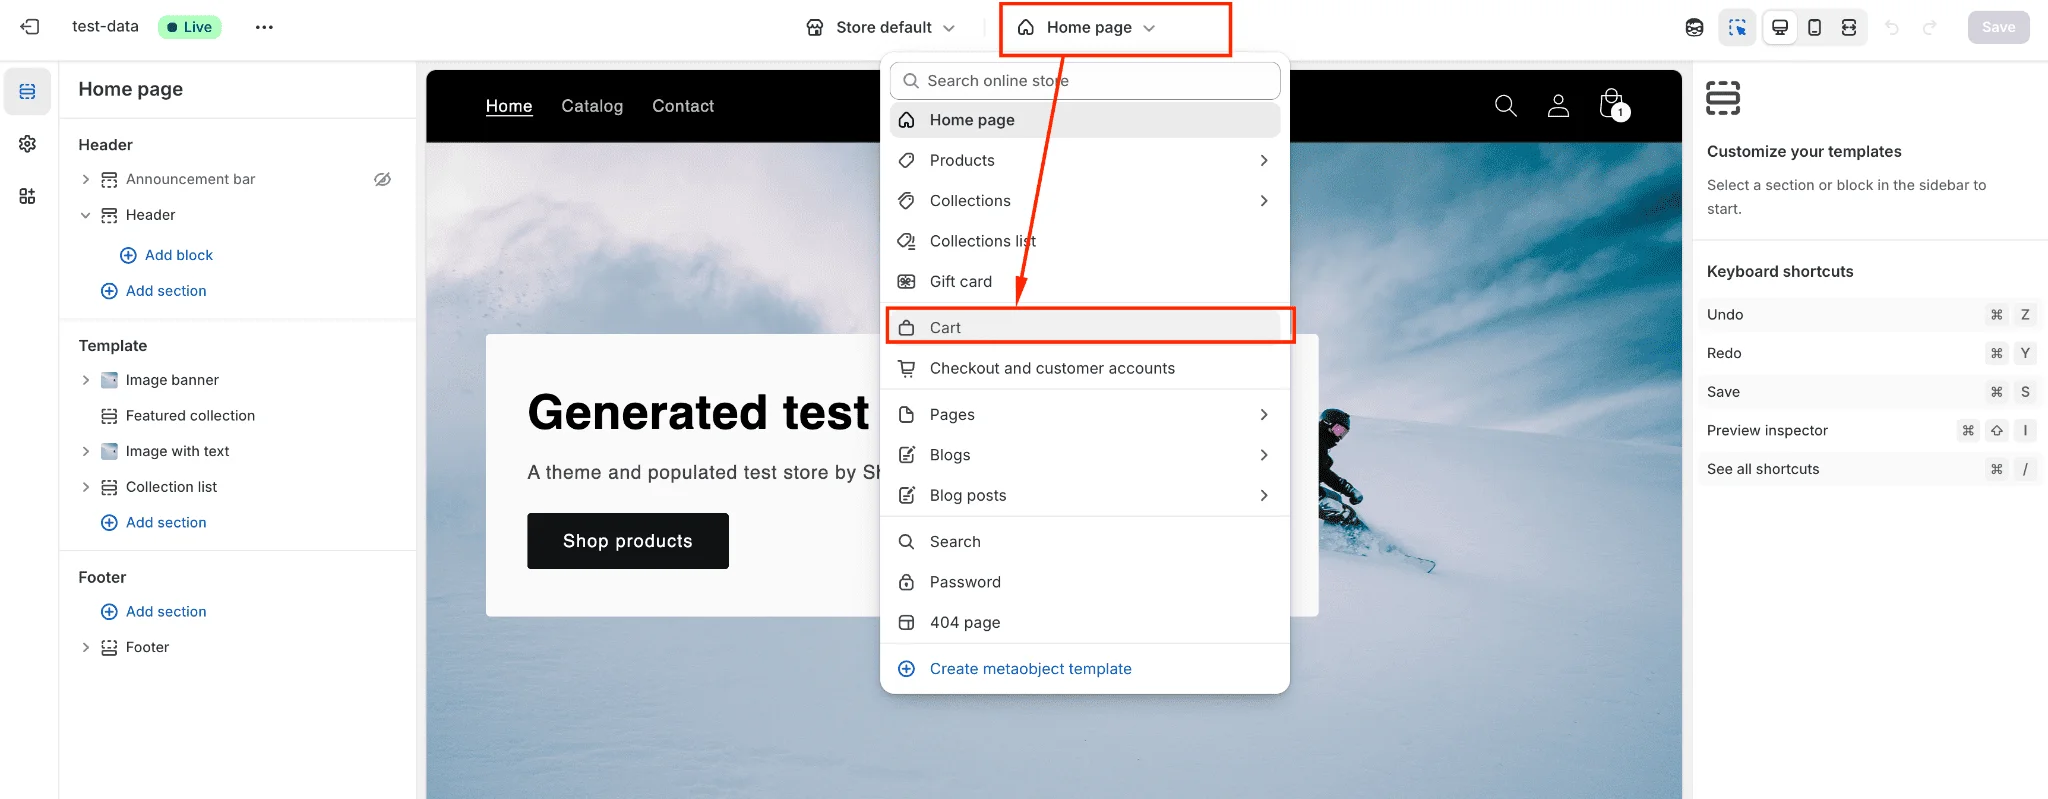
5. Theme Settings
Configure your Shopify theme to enable VesuvioPay on your website. Follow these steps in order:
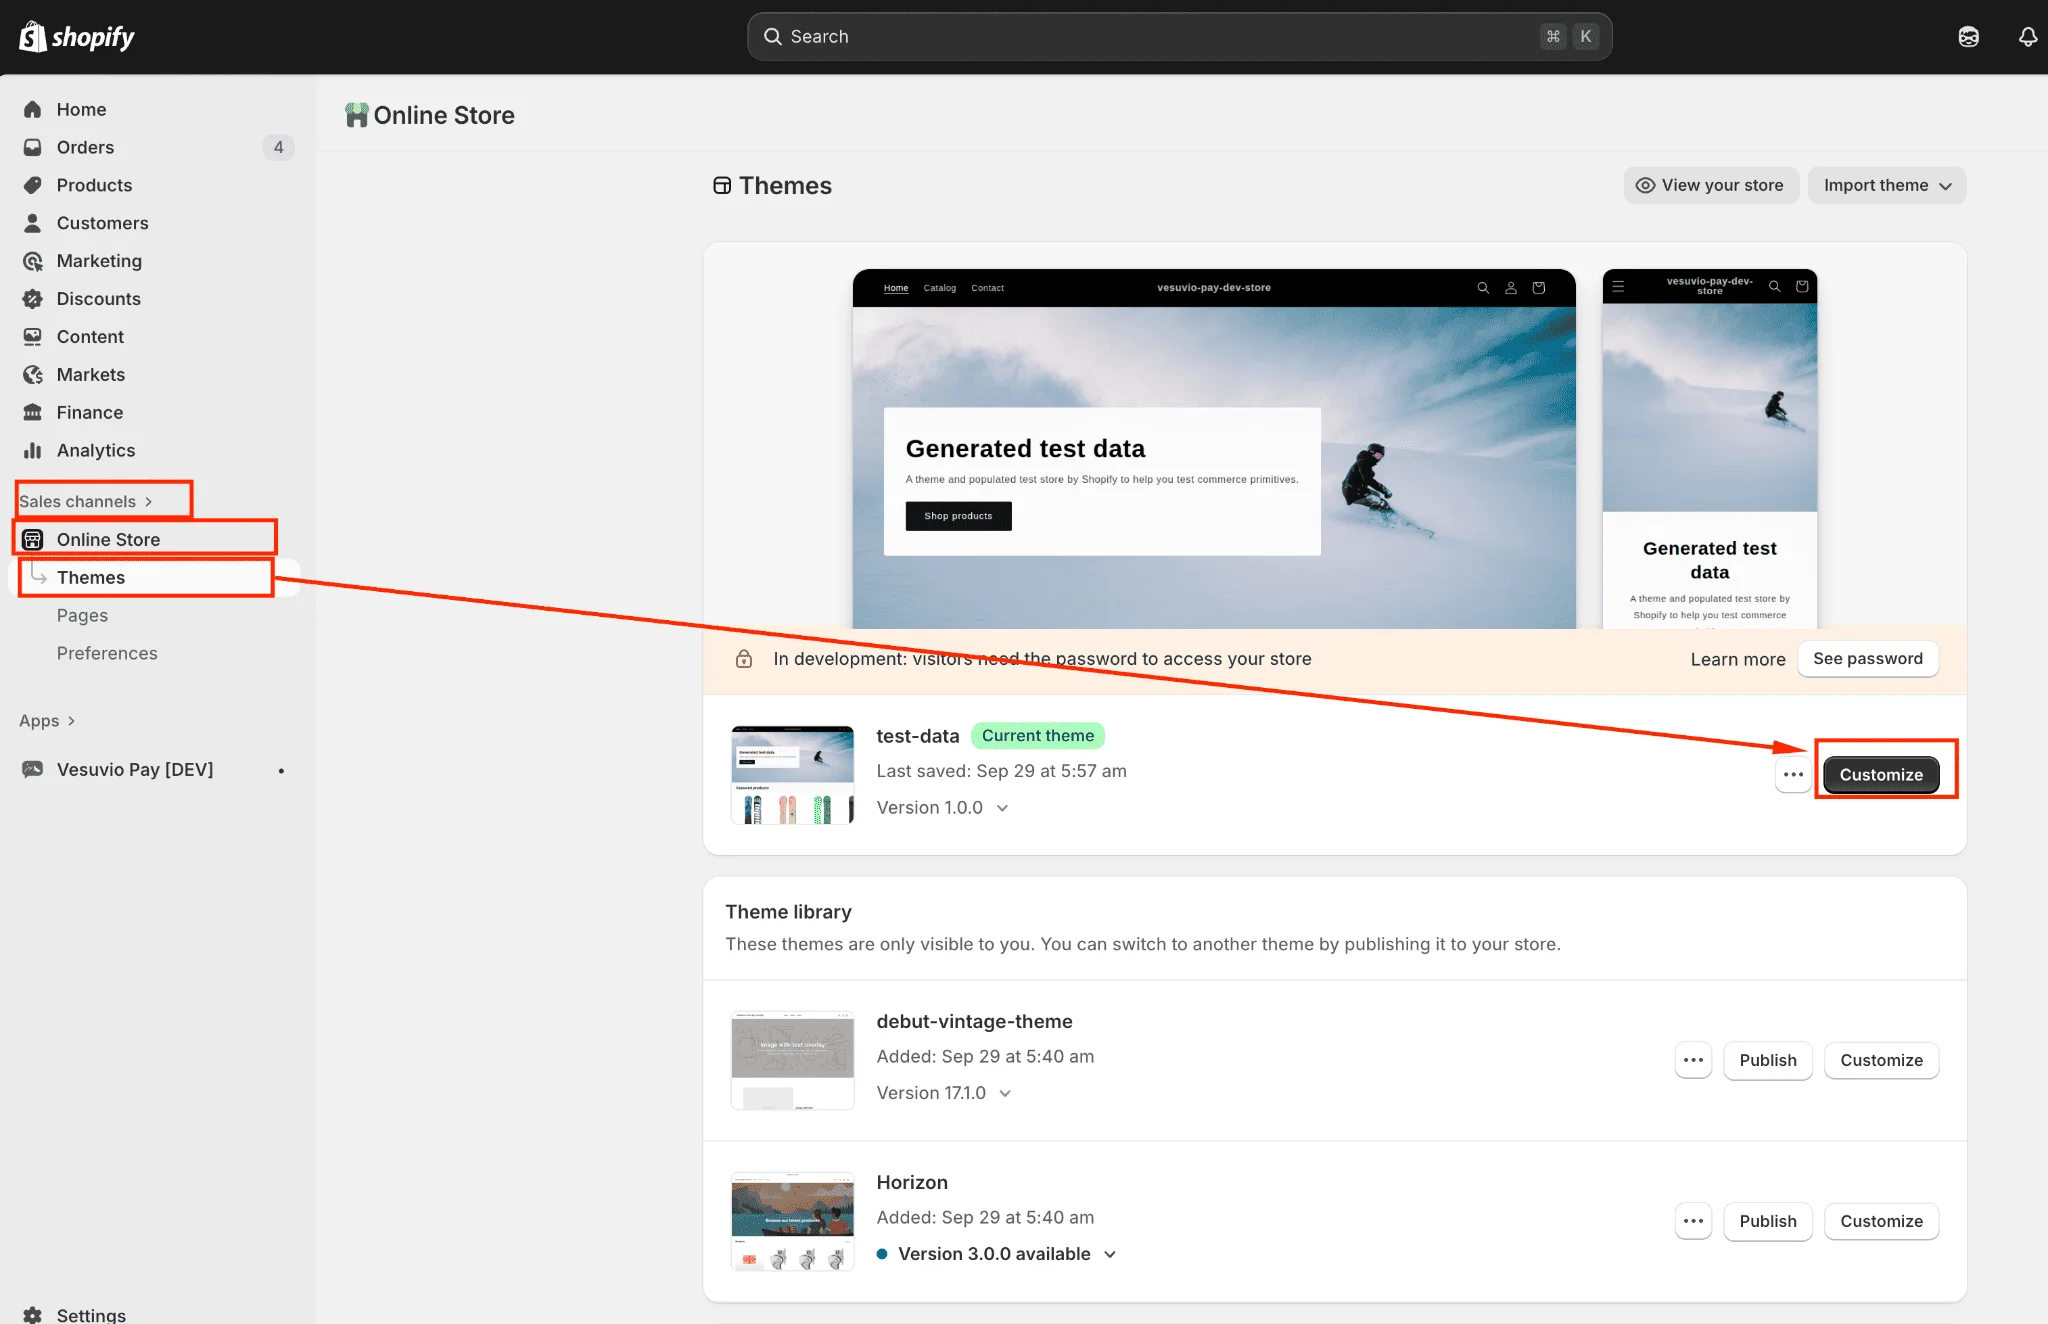
Steps 1–2: Navigate to Theme Customizer
- Navigate to Sales Channels → Online Store → Themes.
- On your published theme, click the Customize button.
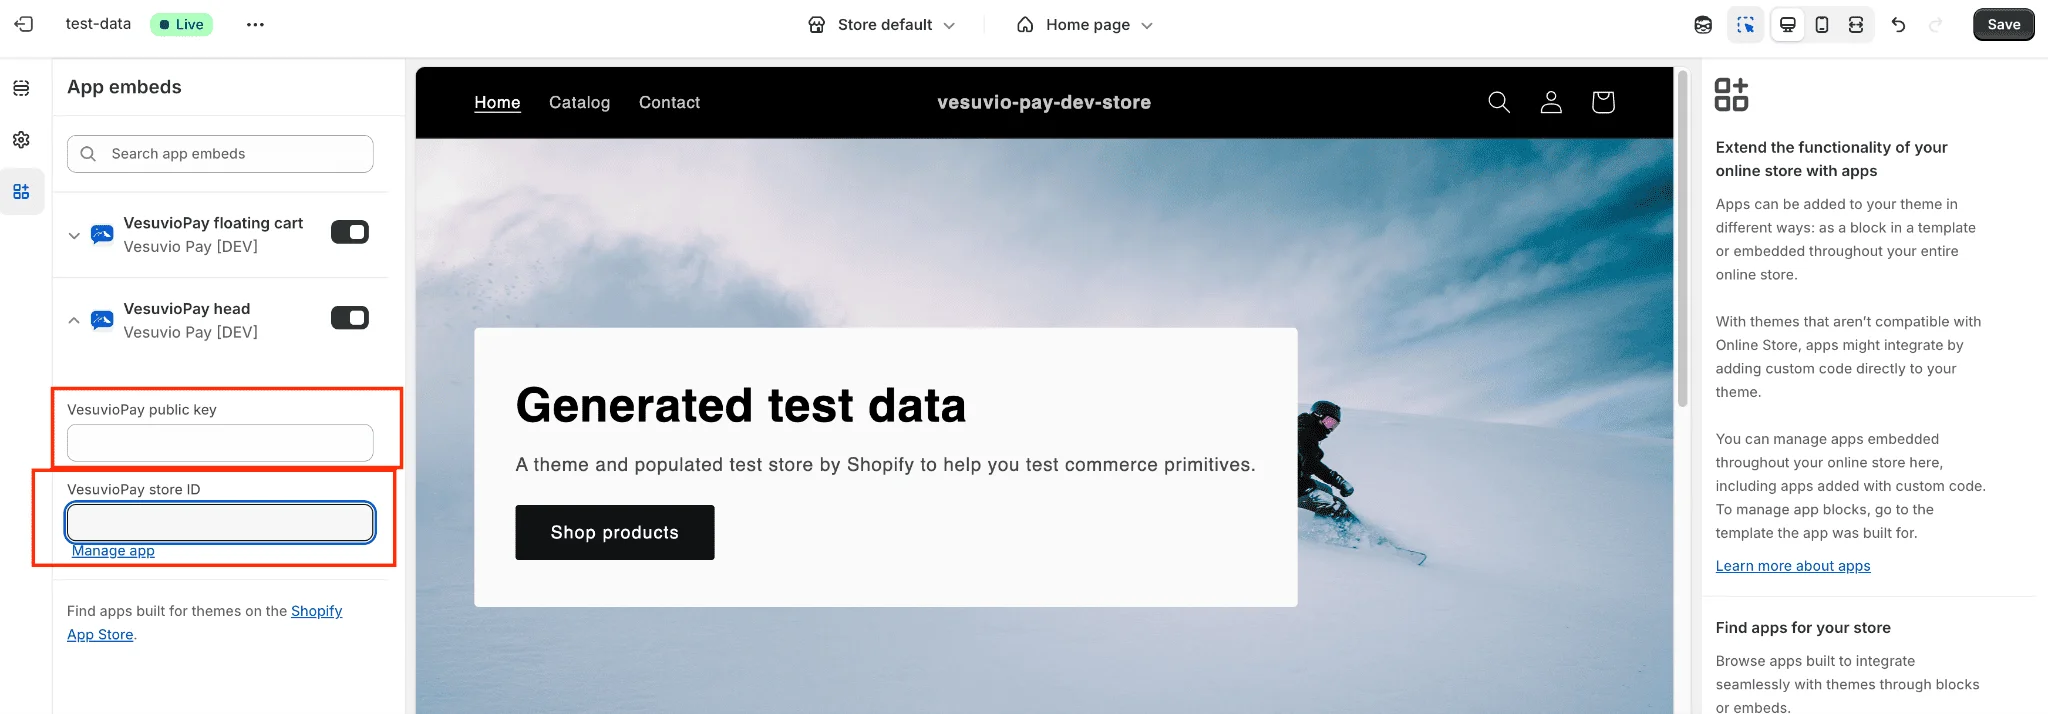
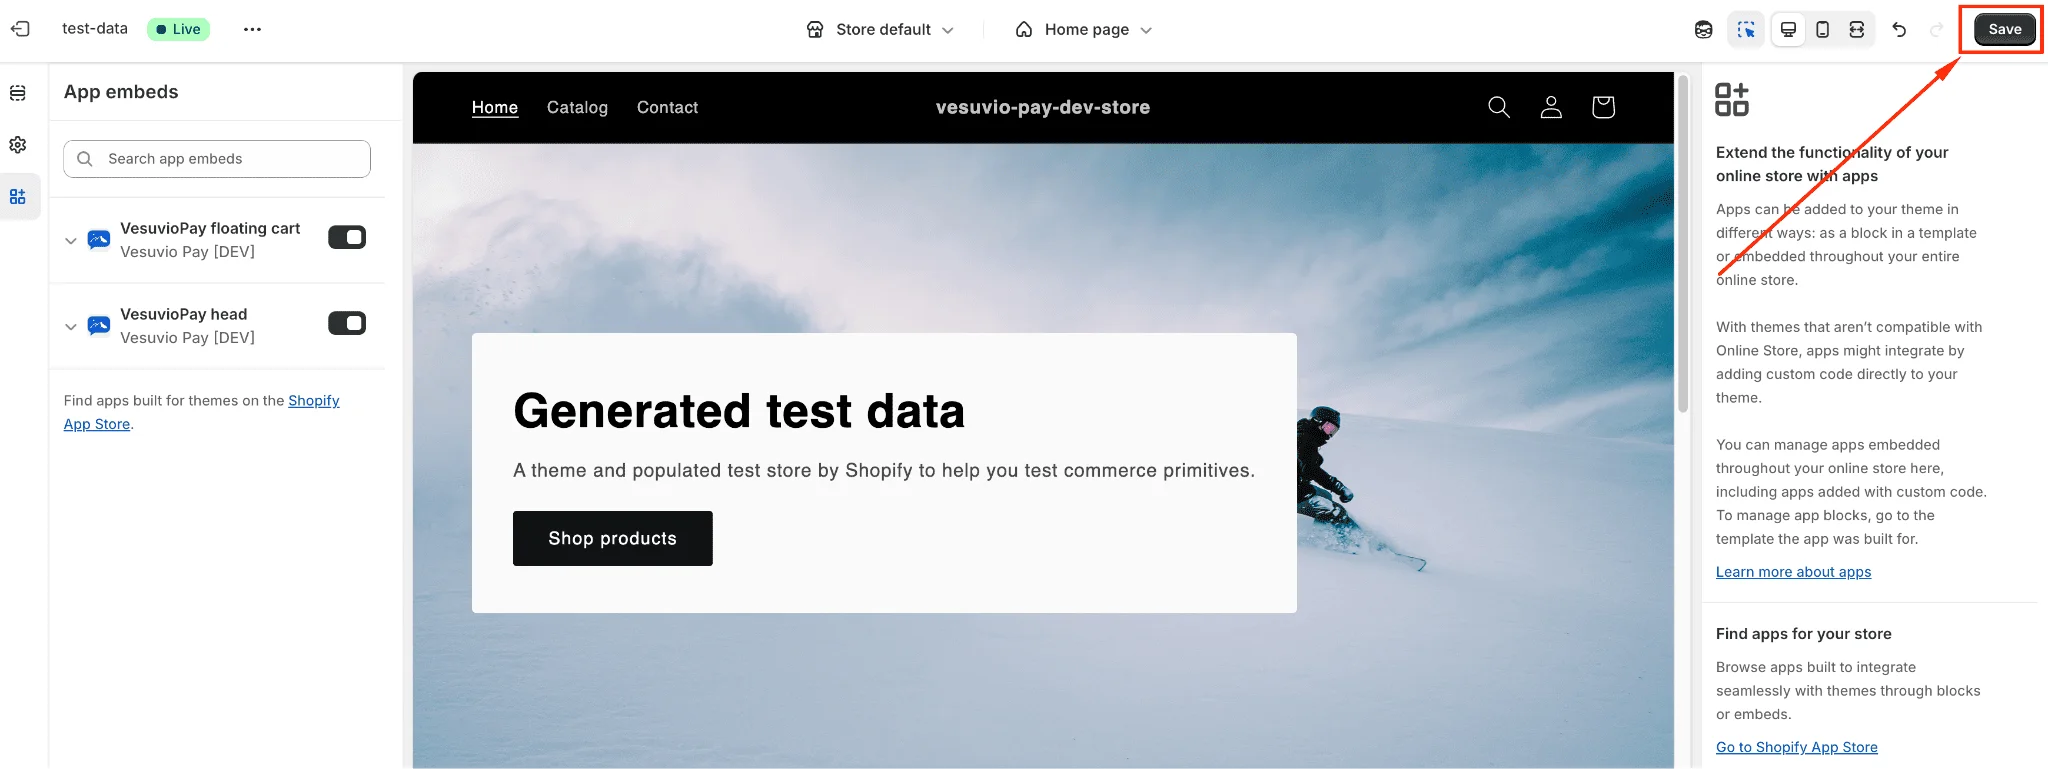
Steps 3–4: Enable App Embeds
- In the Shopify theme customizer, click the App embeds icon on the left sidebar.
- Search for VesuvioPay head and VesuvioPay floating cart widgets, then enable them.

Step 5: Configure Head Widget
- Select the VesuvioPay head widget and enter the following (both values are available on the VesuvioPay Dashboard):
- VesuvioPay public key
- VesuvioPay store ID
Step 6: Configure Head Widget Settings
- Complete the VesuvioPay head widget configuration.
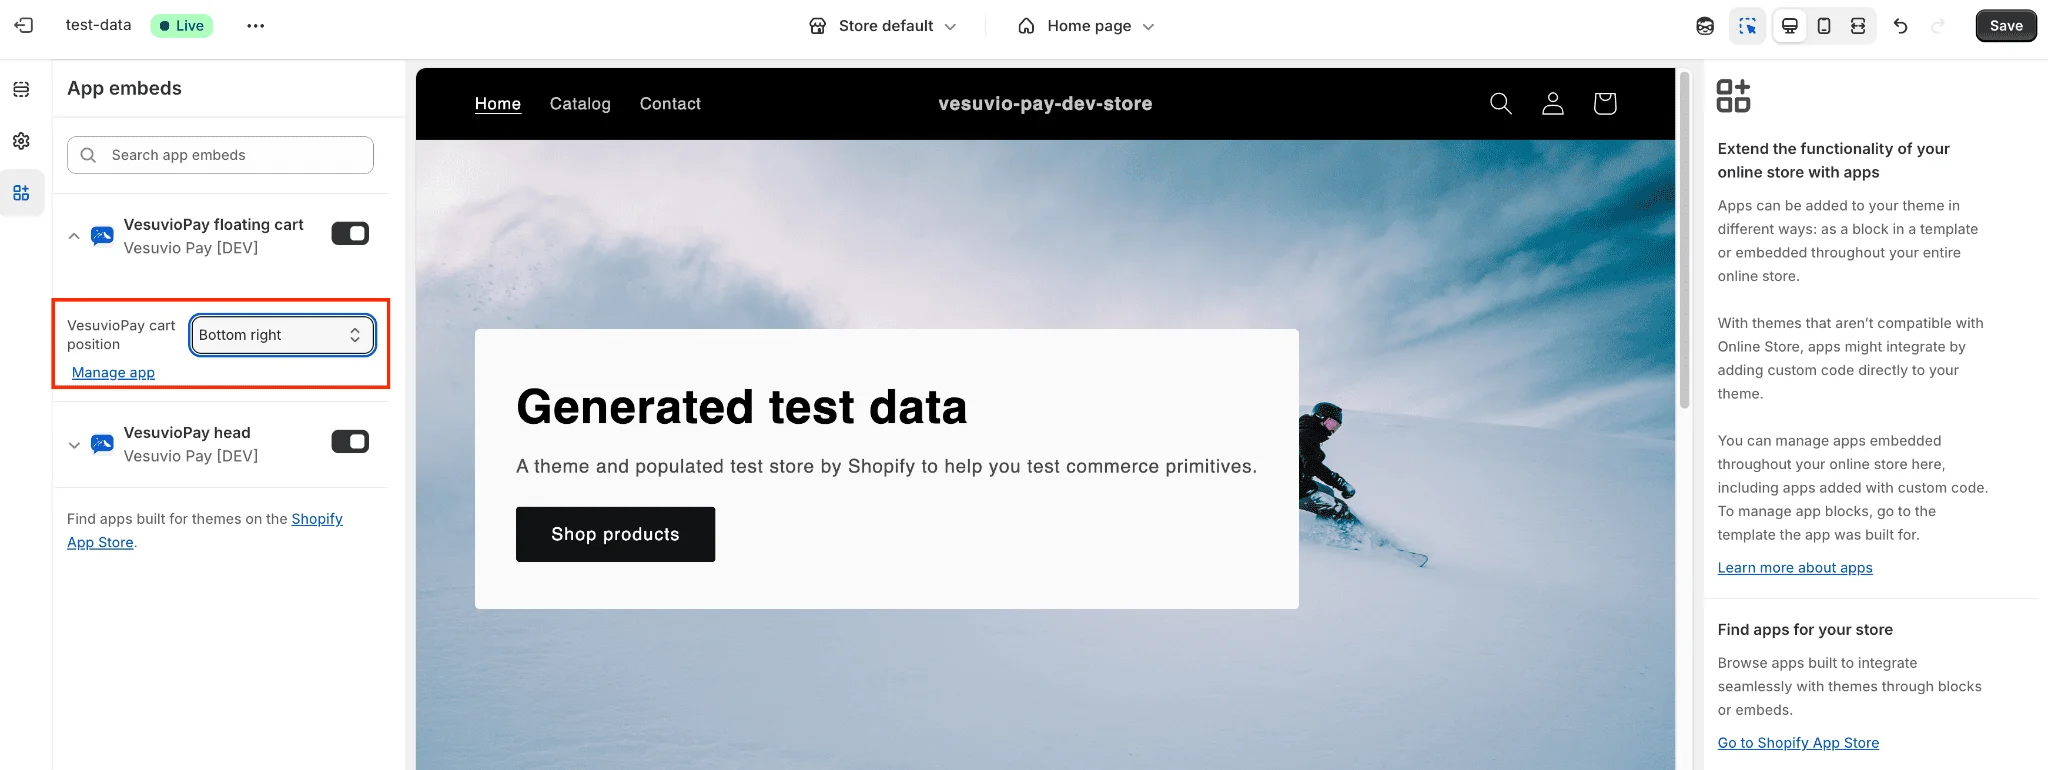
Step 7: Configure Floating Cart (Optional)
- Select VesuvioPay floating cart and adjust the cart position on the page if needed.
Step 8: Save Changes
- Save your changes.

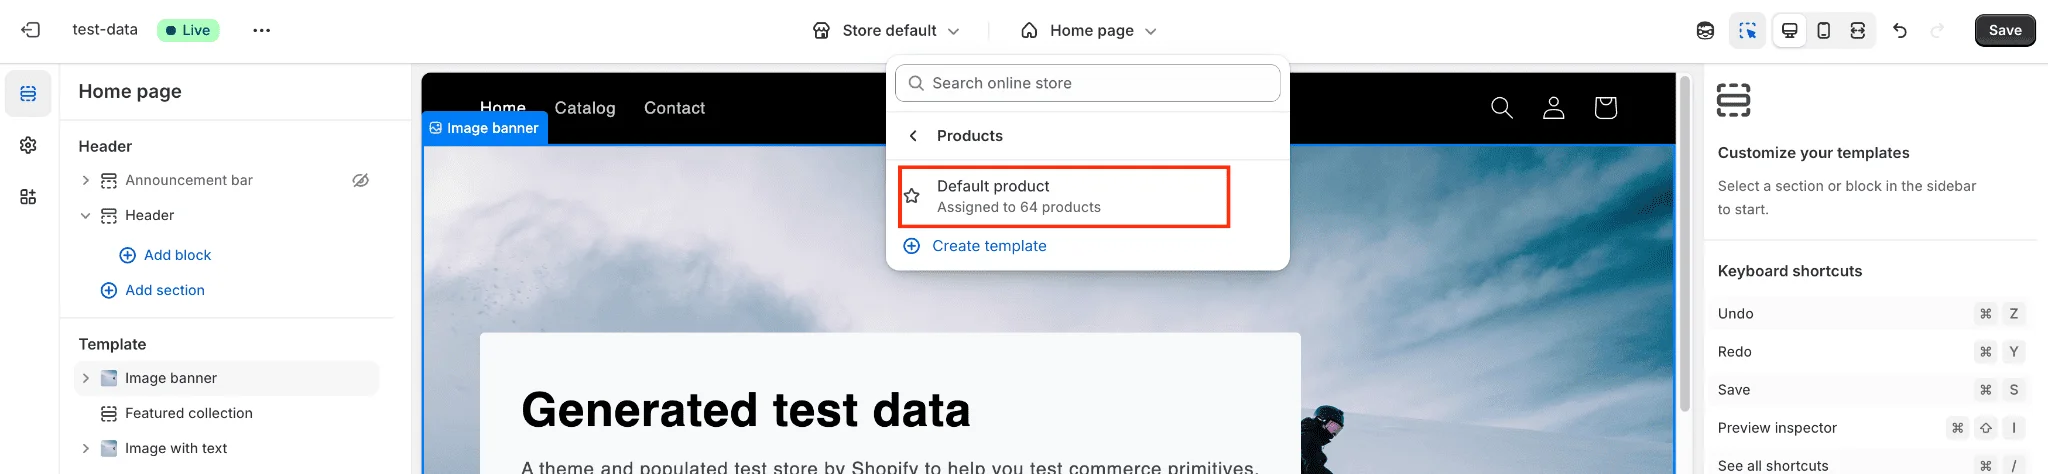
Step 9: Navigate to Product Page
- In the theme customizer, navigate to a product page (select any product).
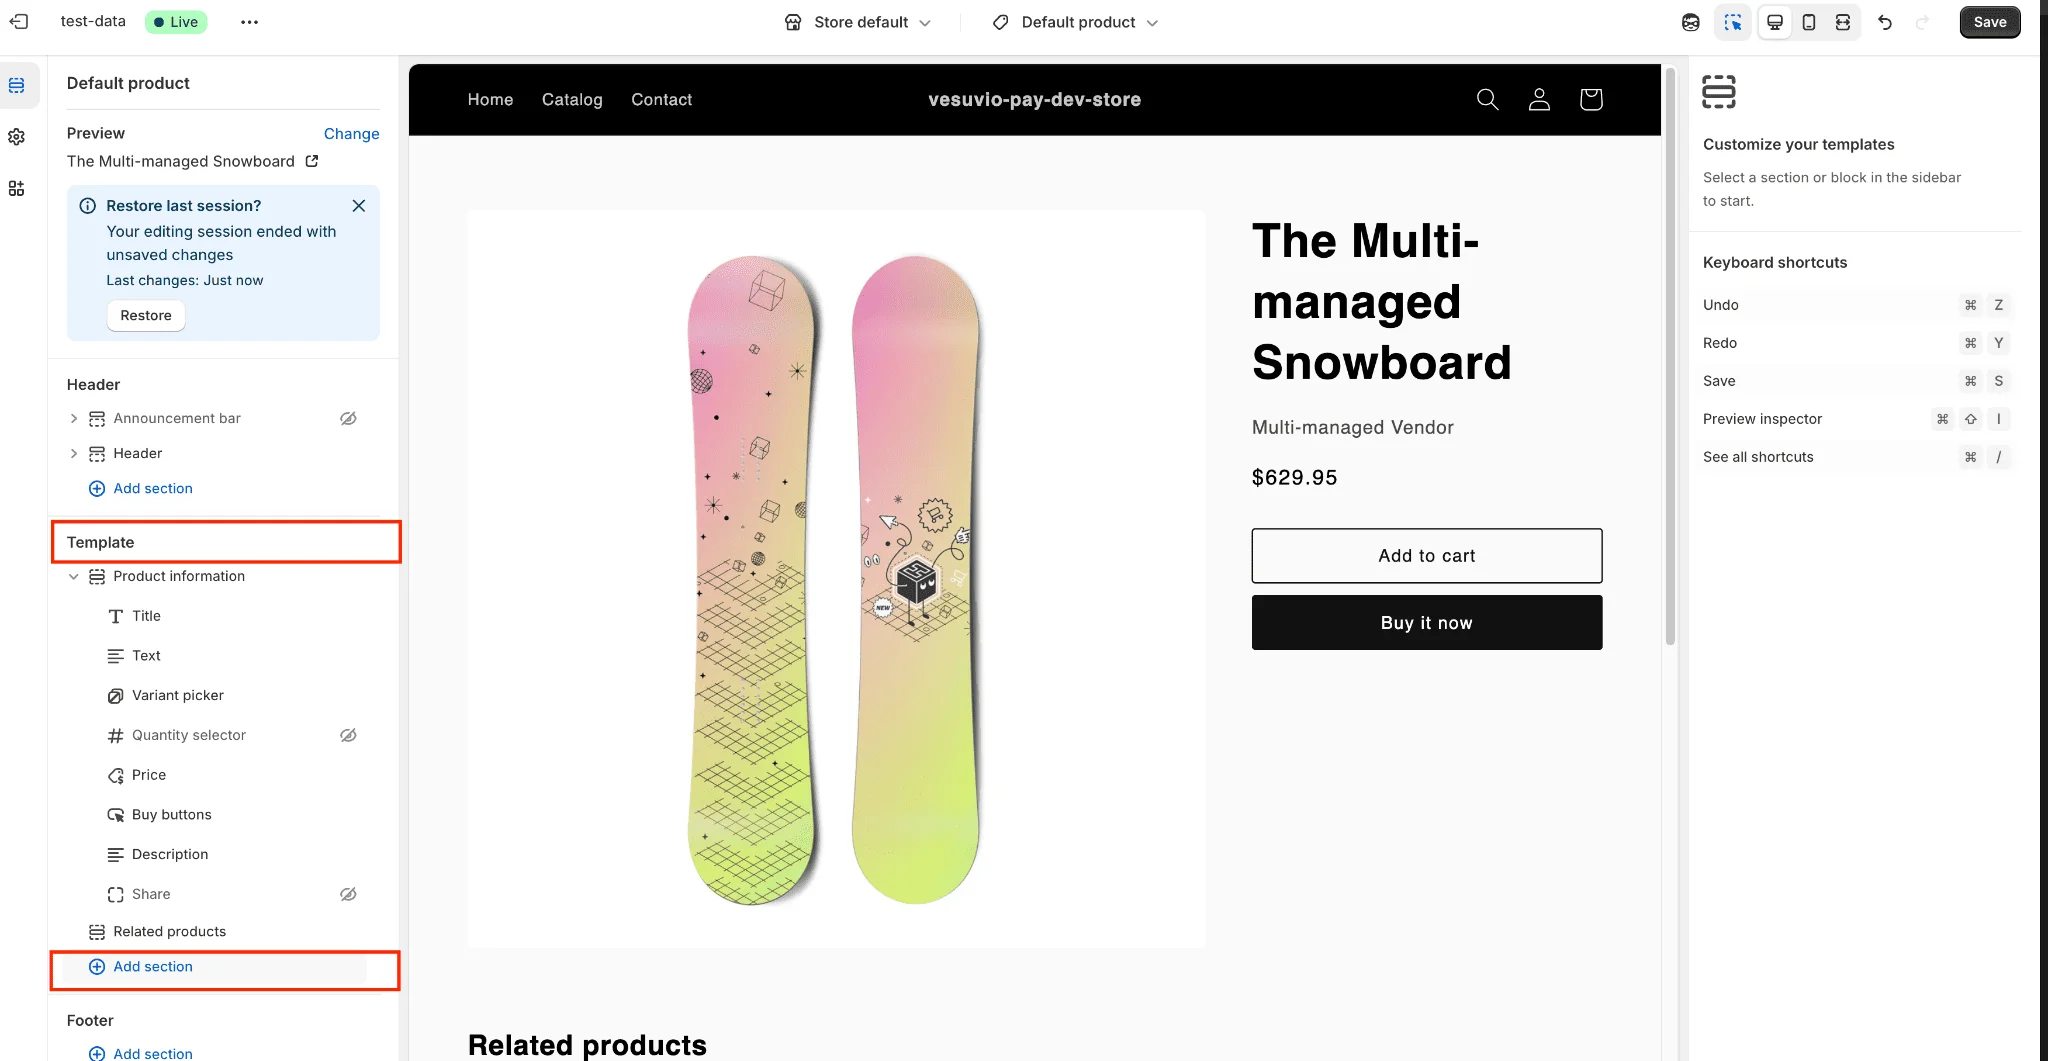
Step 10: Add Section
- On the left sidebar in the Template section, click Add section.
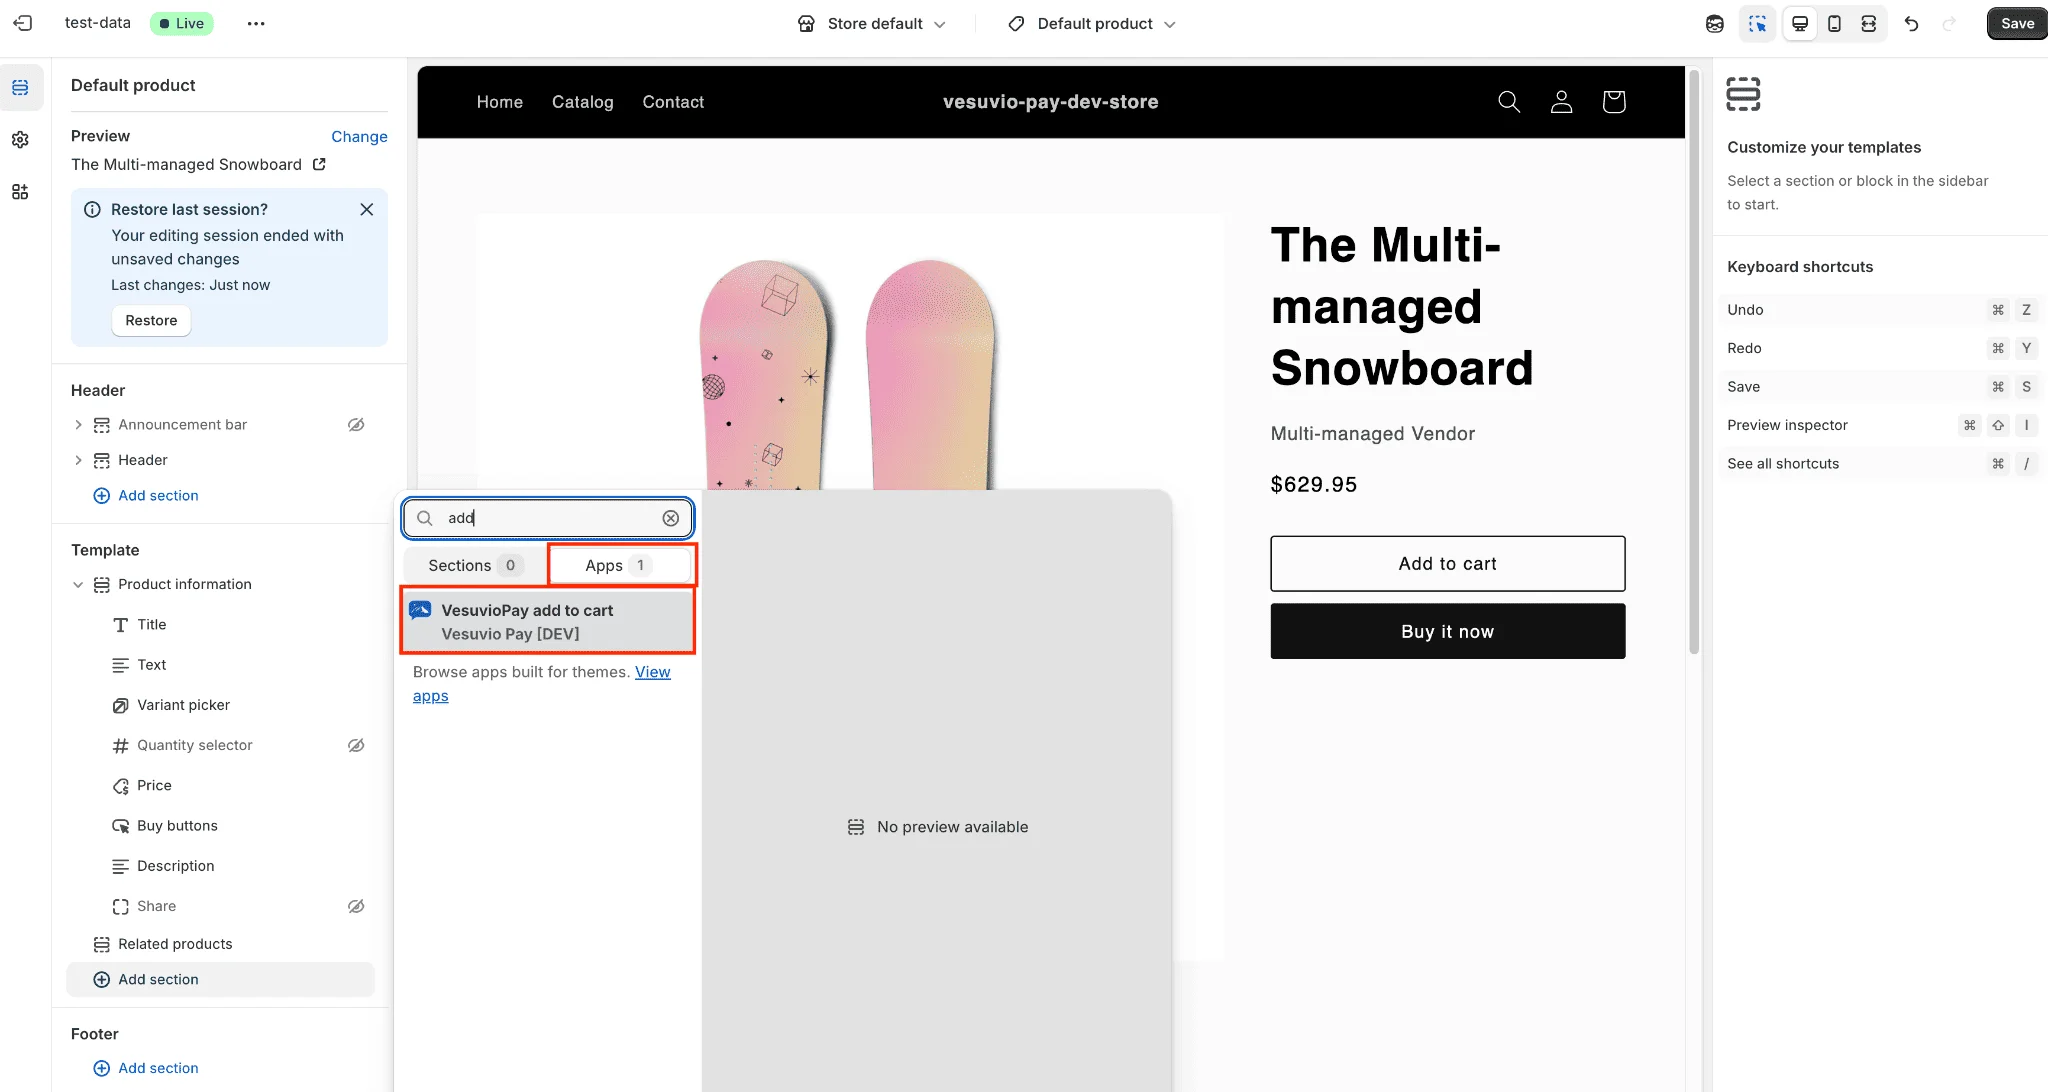
Step 11: Add VesuvioPay Add to Cart
- In the Add section popup, select Apps and click on VesuvioPay add to cart. This adds the Vesuvio add-to-cart button to the product page.
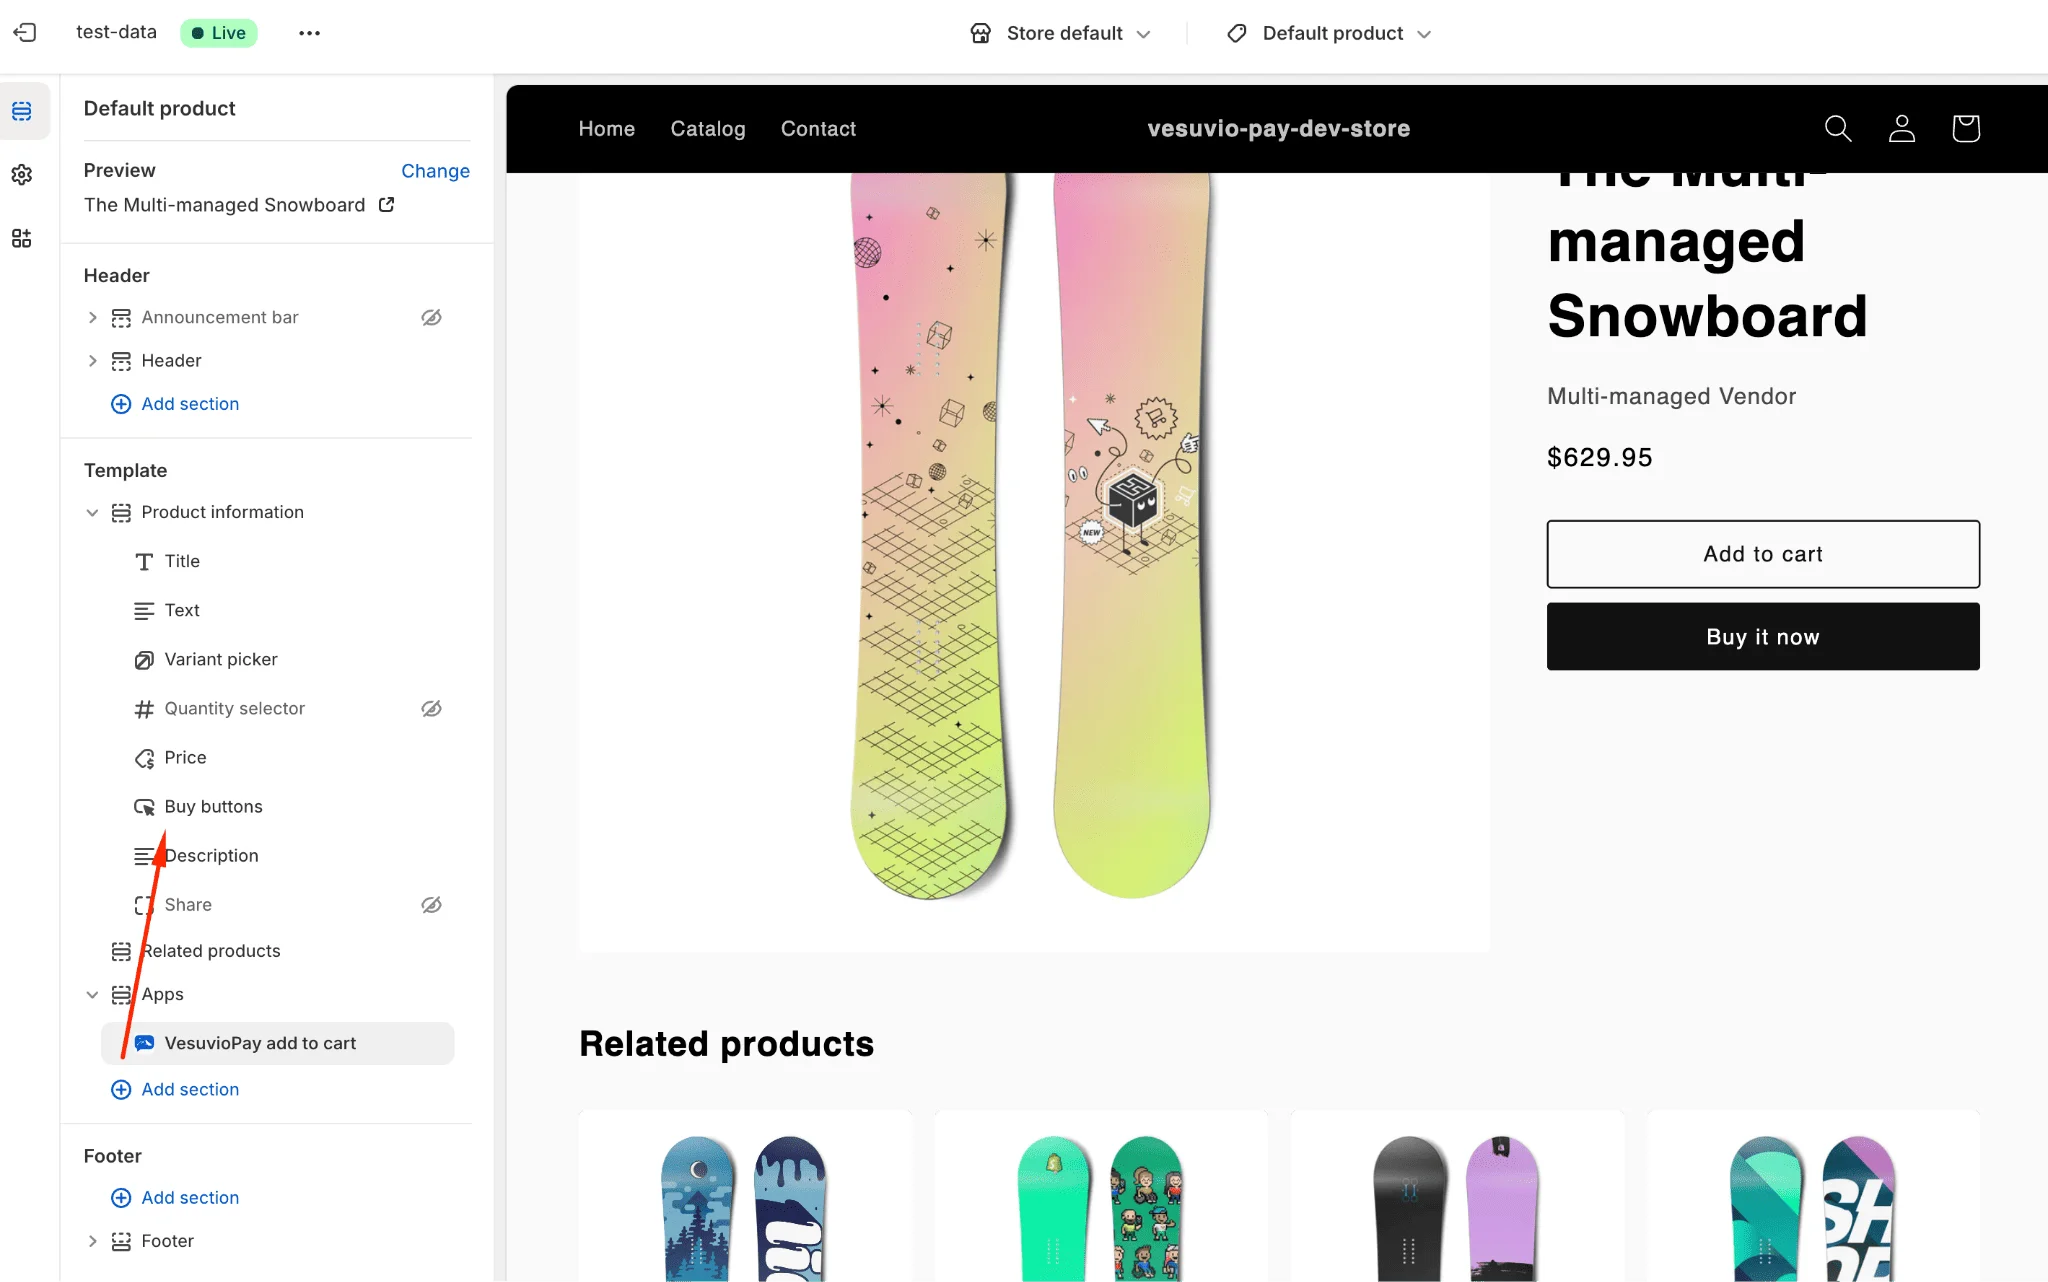
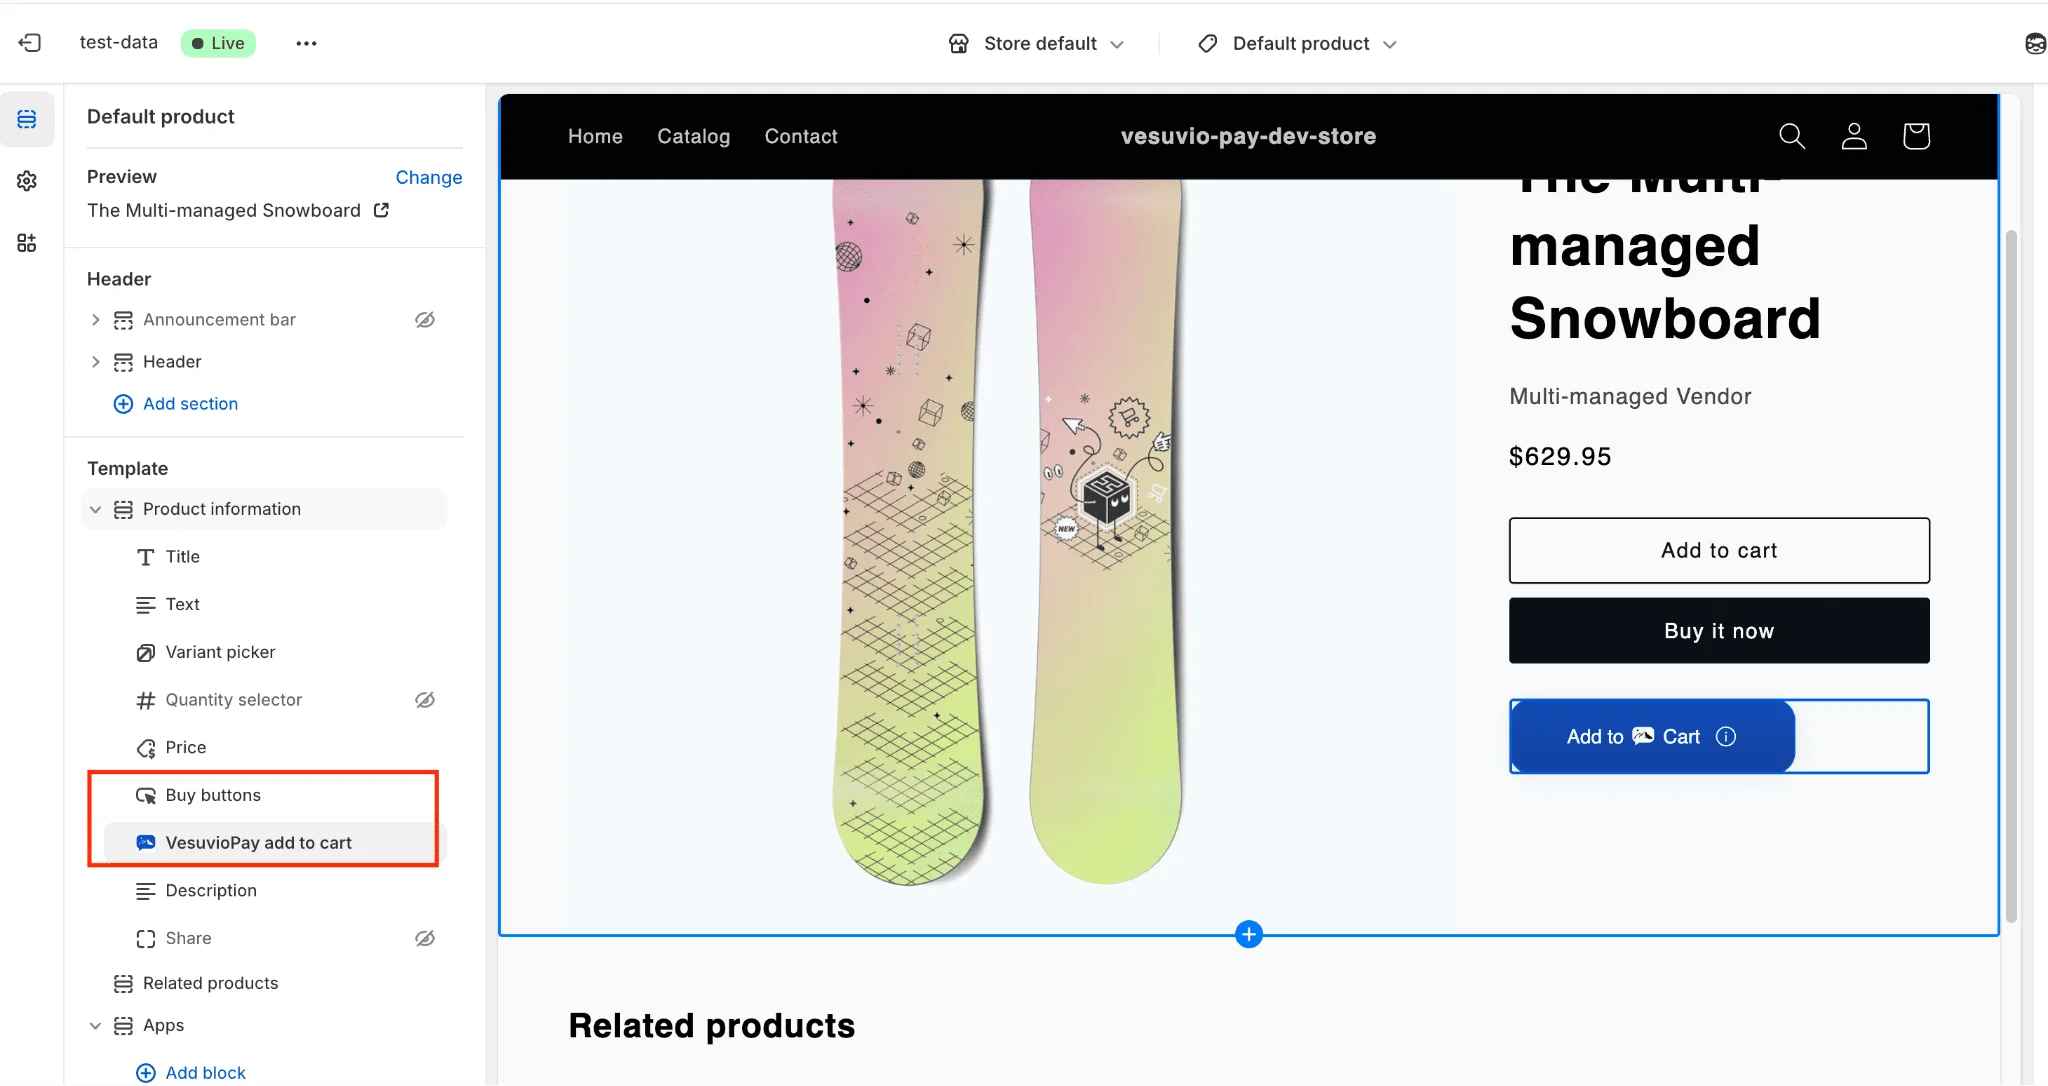
Step 12: Position the Button
Moving the button under the Buy Buttons section is required for the add-to-cart button to function properly.
- On the left sidebar, move the Vesuvio add to cart button under the Buy buttons section.
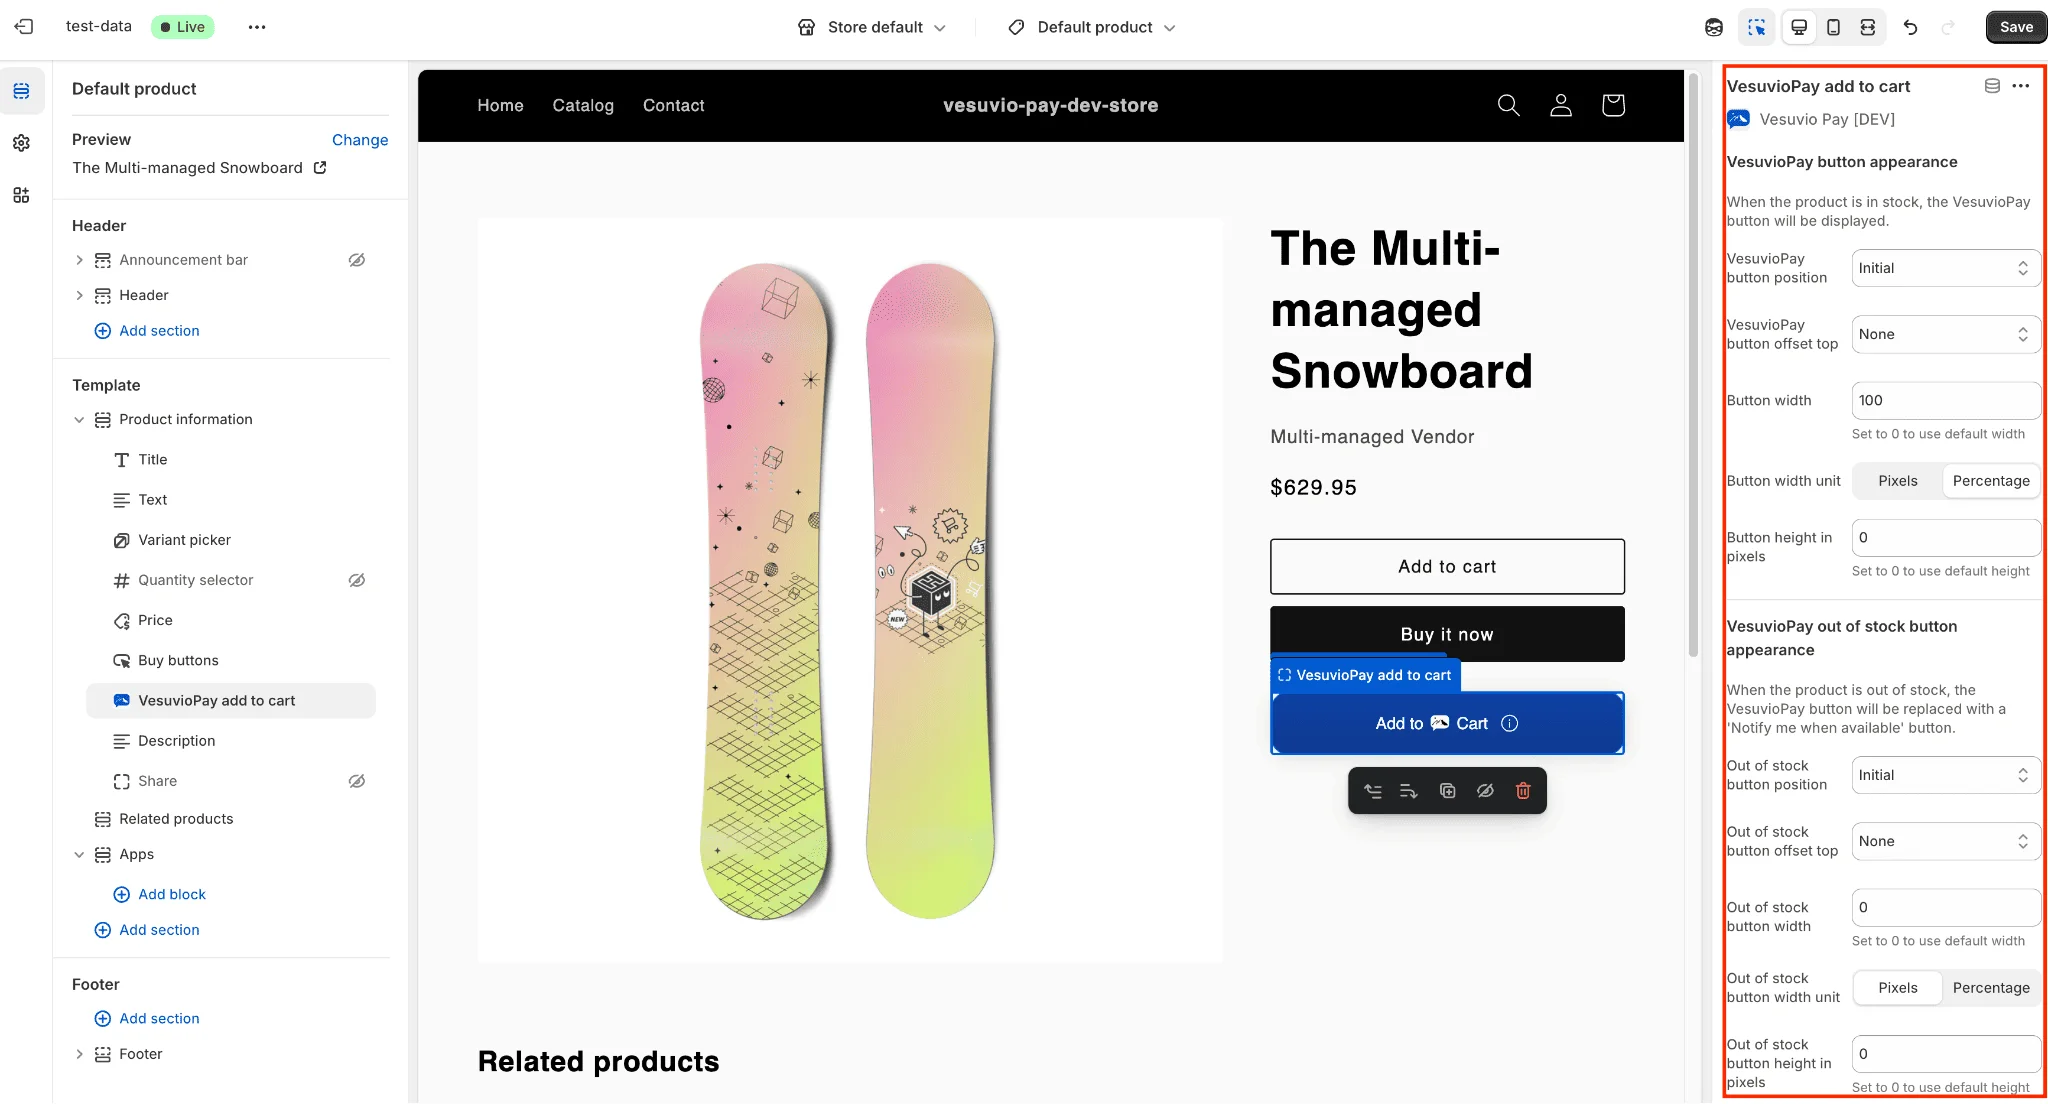
Step 13: Adjust Button Settings (Optional)
- Select the Vesuvio add to cart button and adjust settings such as width, height, and alignment on the right sidebar.
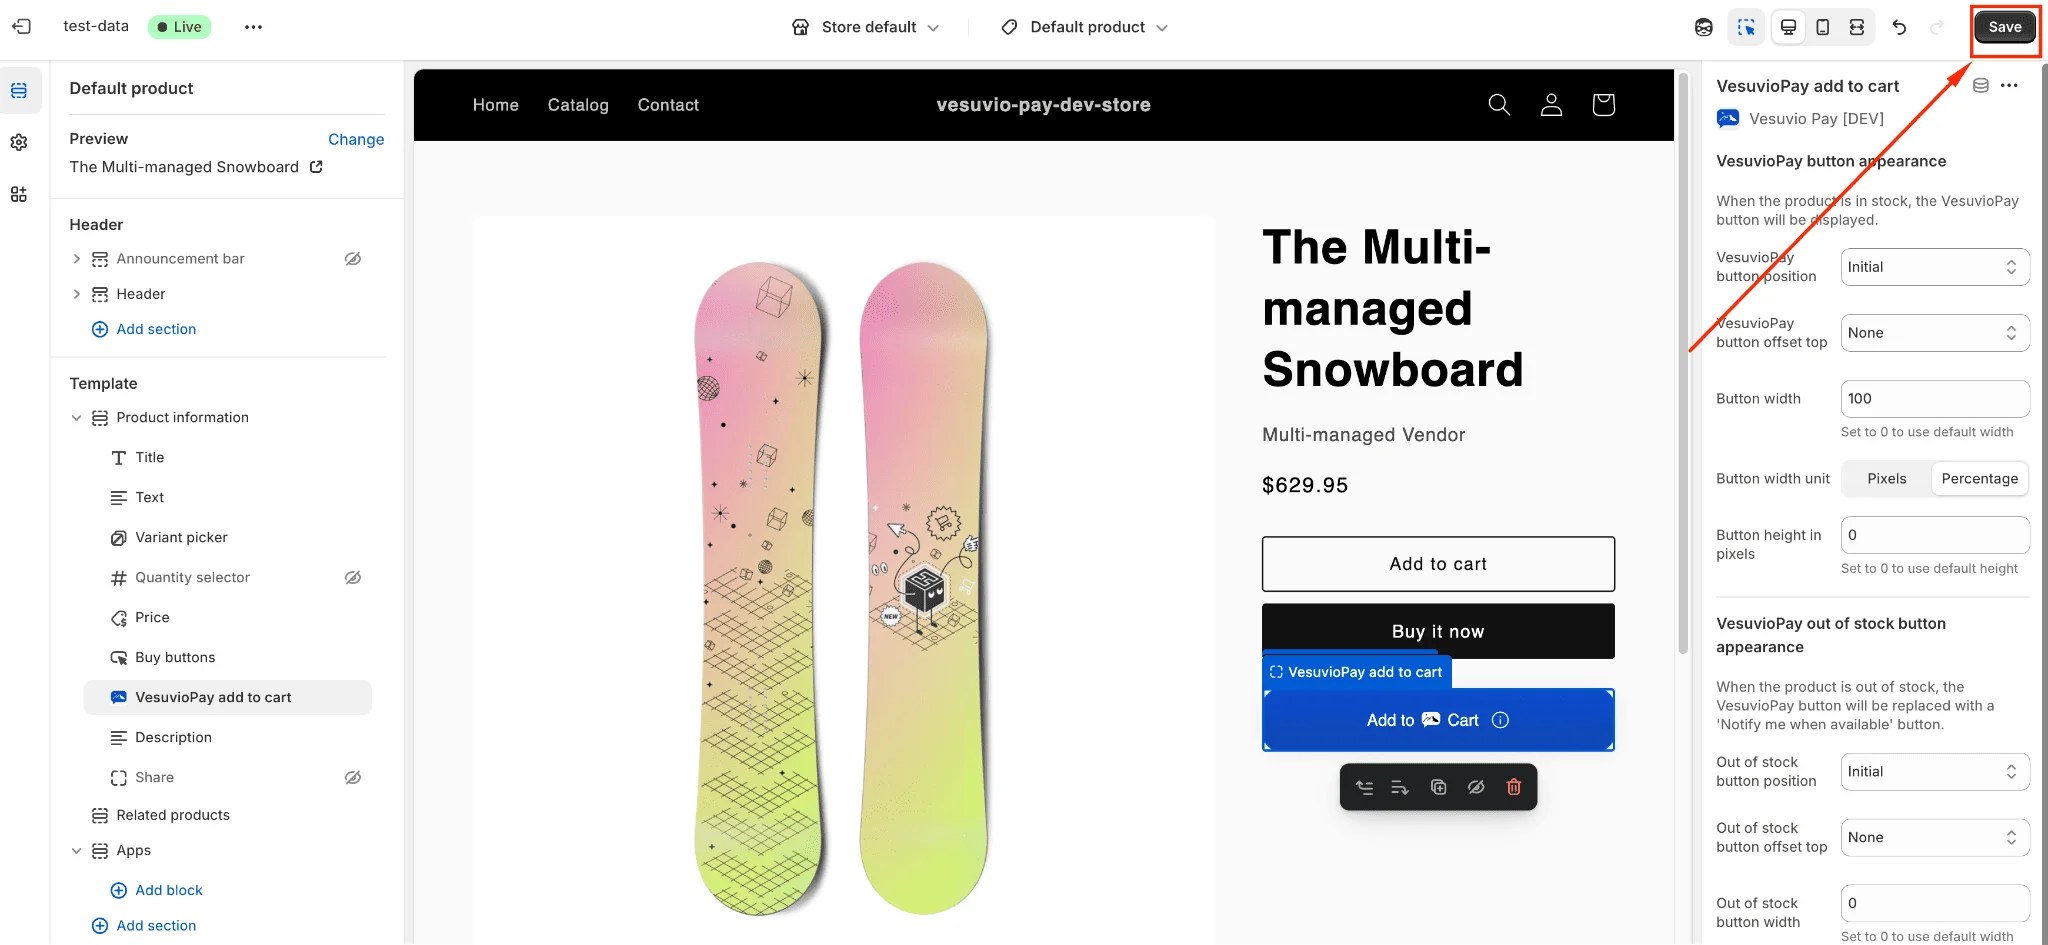
Step 14: Save Changes
- Save your changes.
Step 15: Navigate to Cart Page
- In the theme customizer, navigate to the cart page.
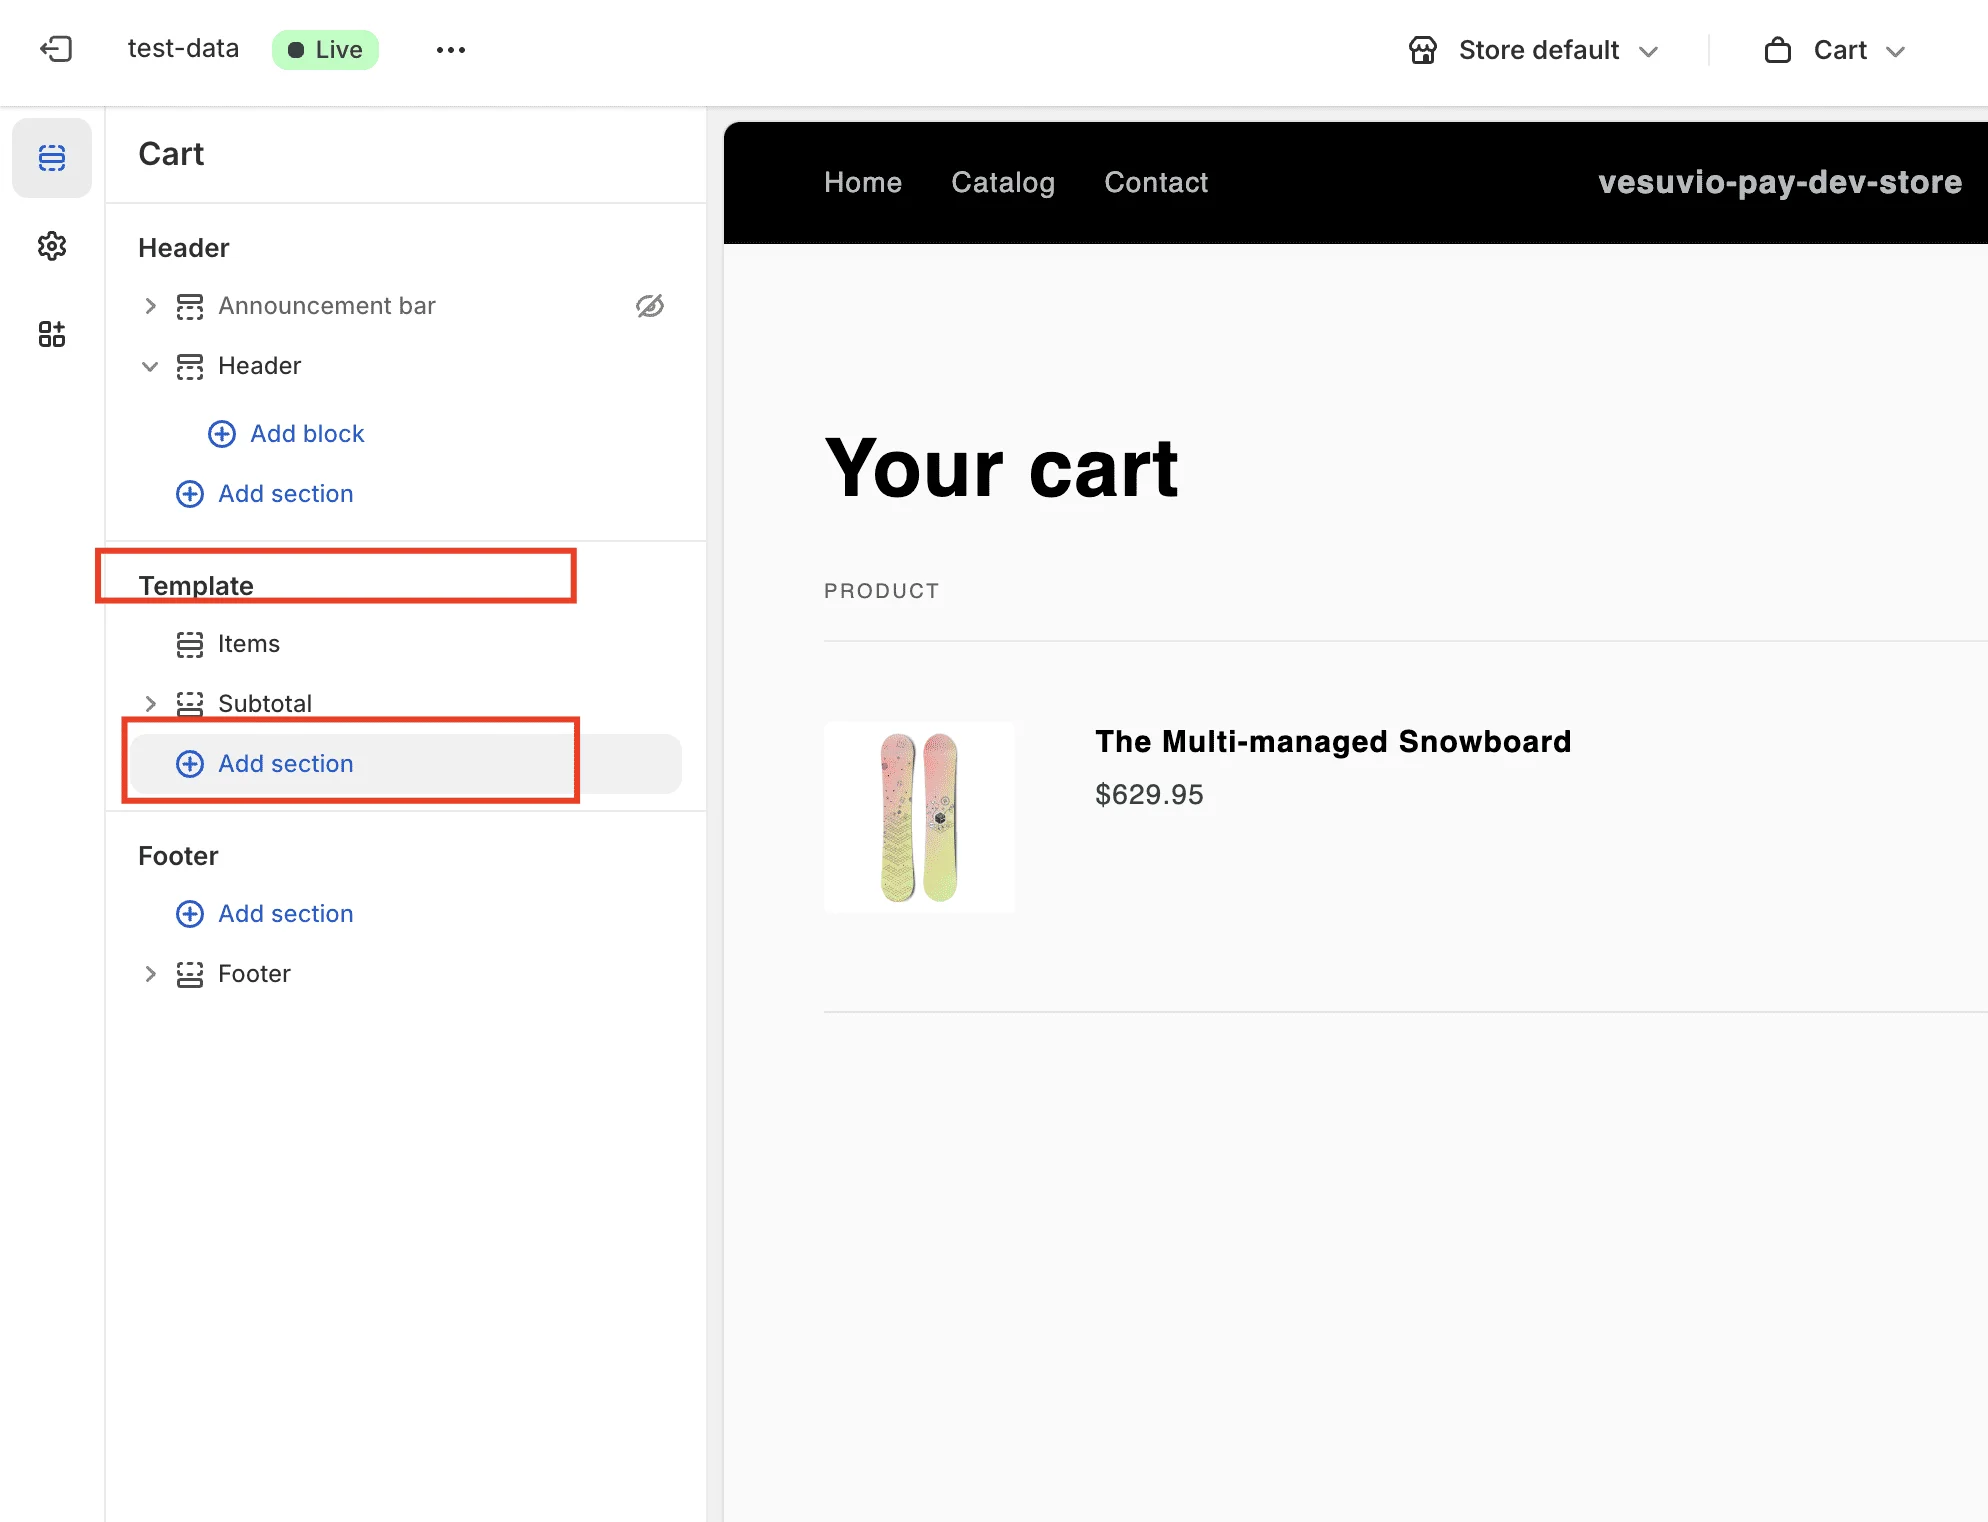
Step 16: Add Section on Cart Page
- On the left sidebar in the Template section, click Add section.

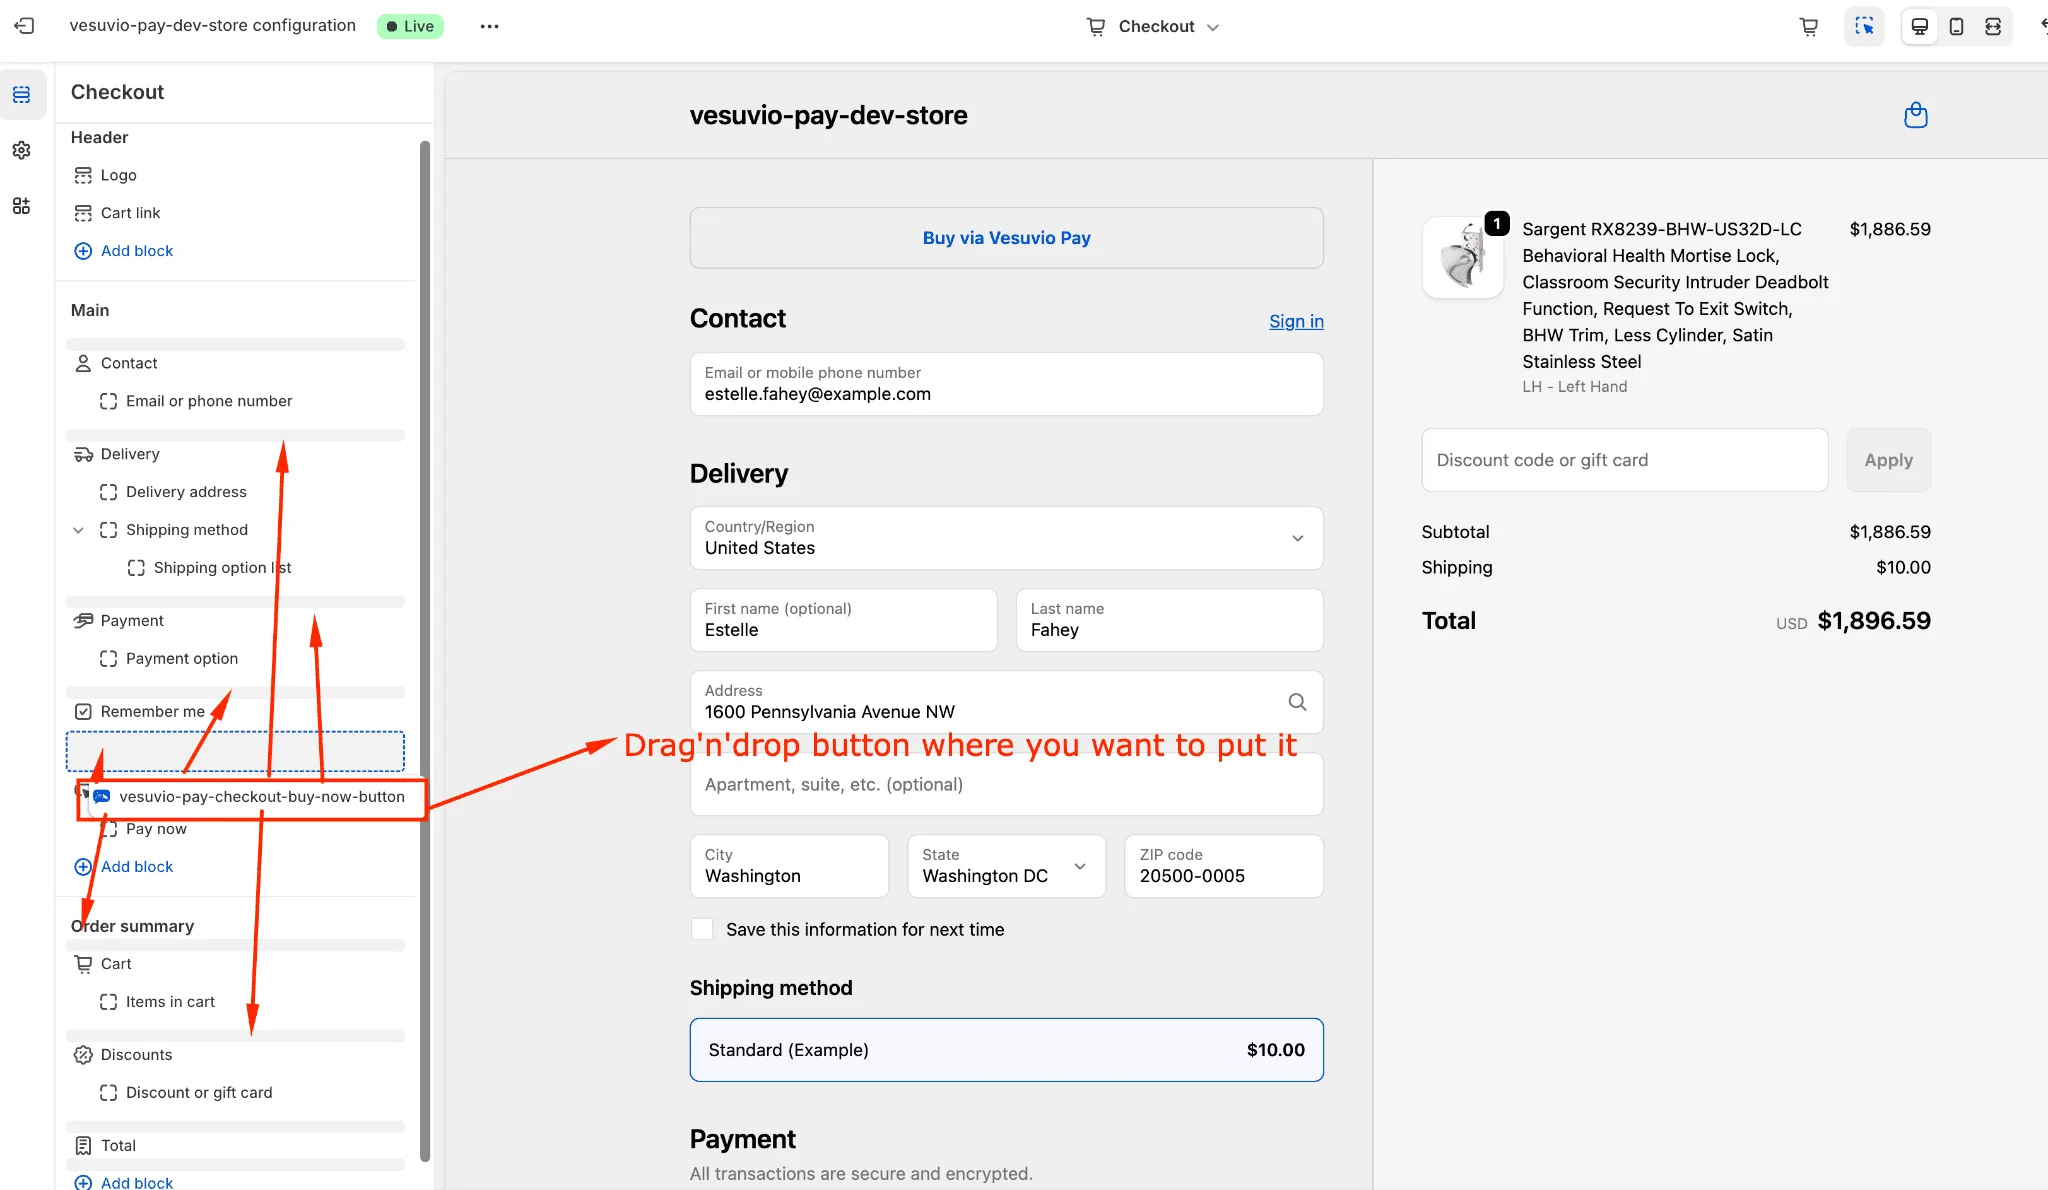
Step 17: Add VesuvioPay Buy Now
- In the Add section popup, select Apps and click on VesuvioPay buy now. This adds the Vesuvio buy-now button to the cart page.

Step 18: Position the Buy Now Button
- On the left sidebar, move the Vesuvio buy now button to where you want it to appear.
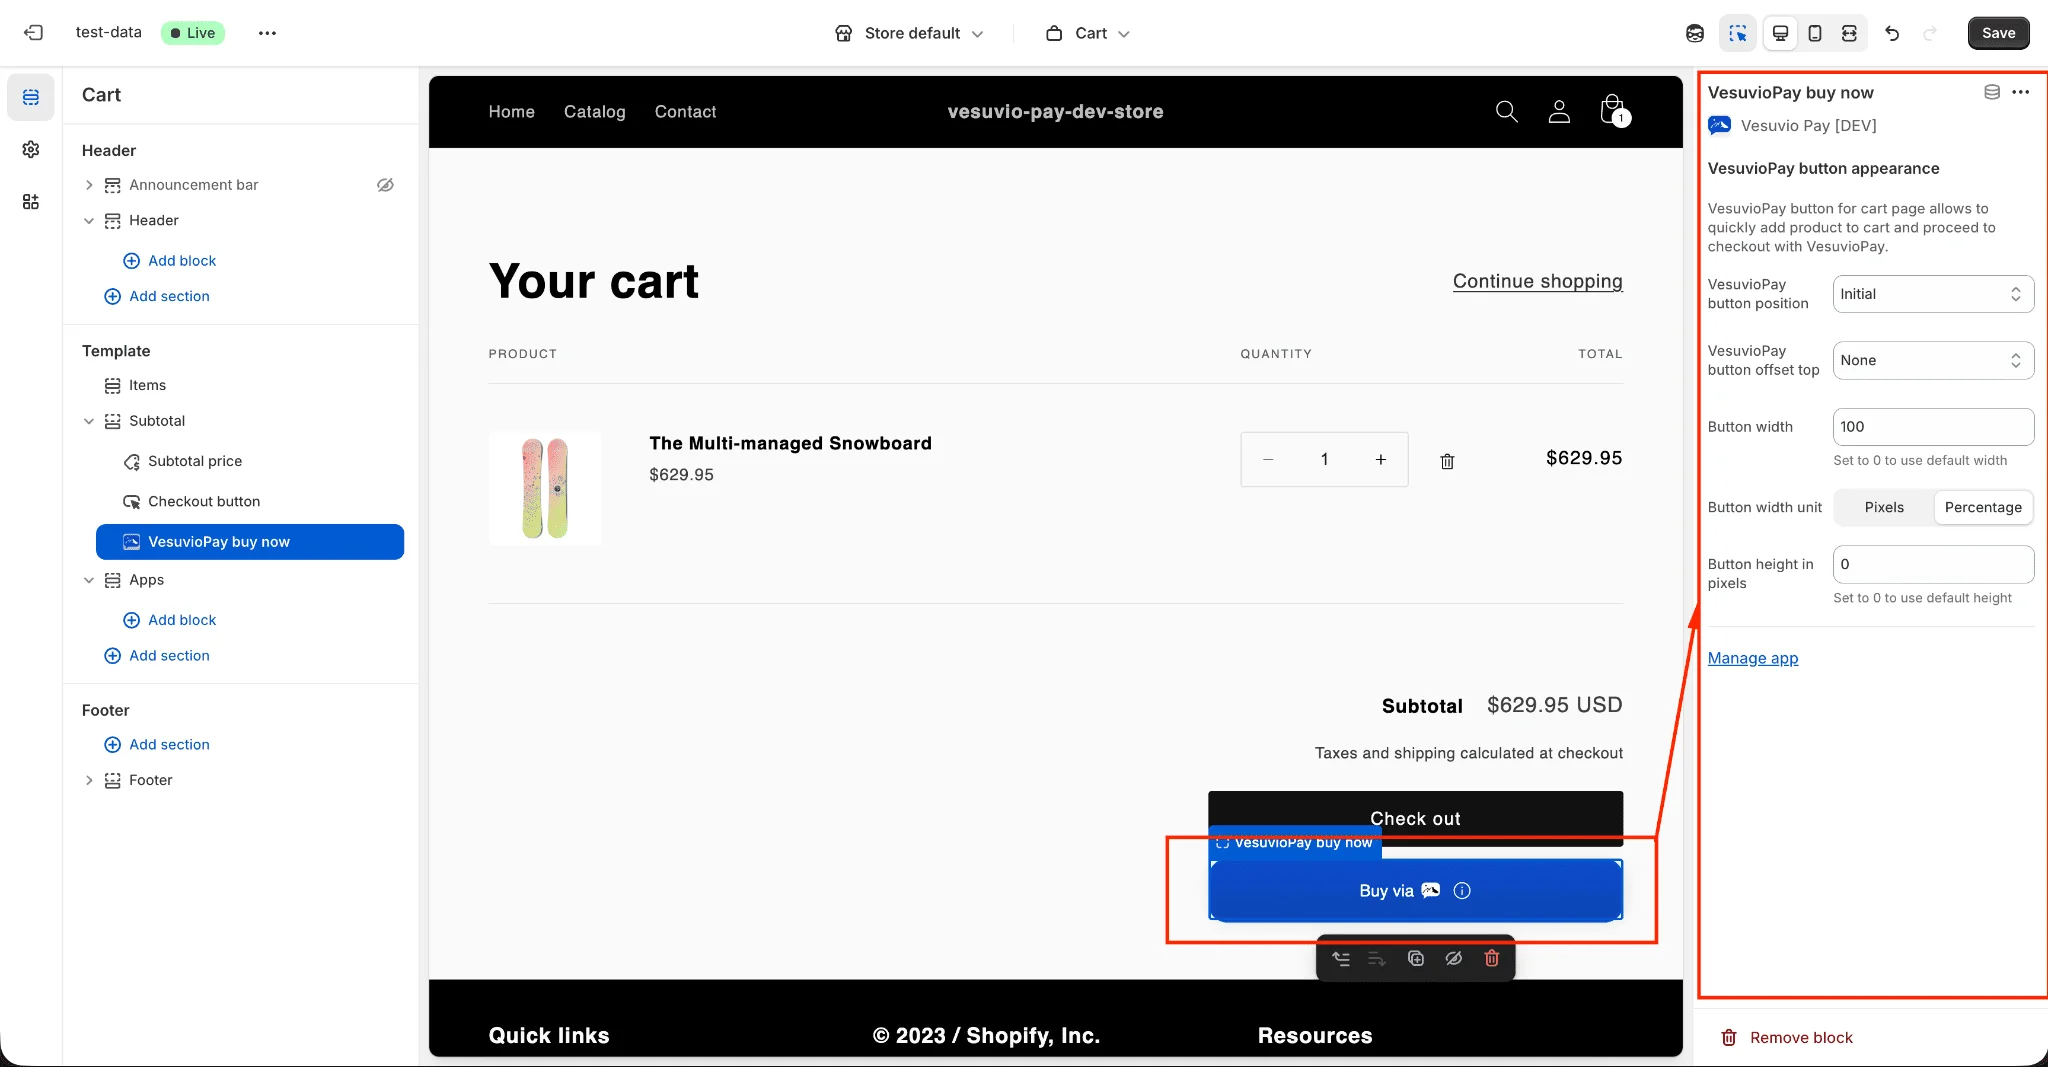
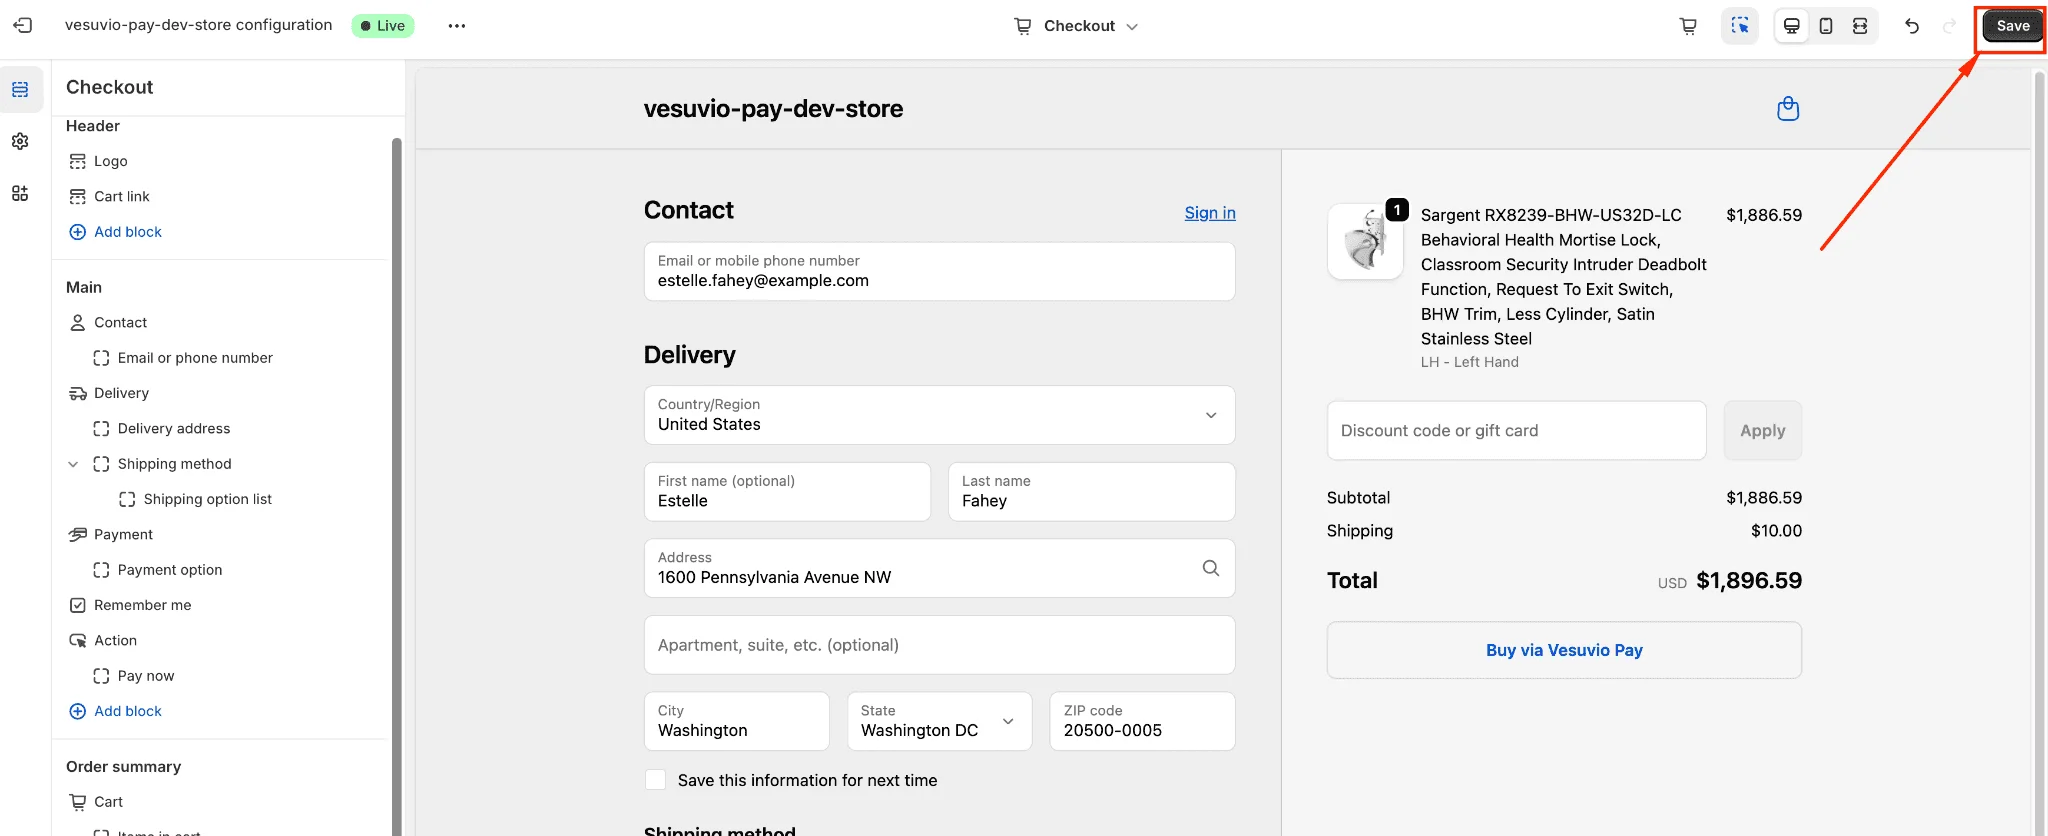
Step 19: Save Changes
- Save your changes.

The VesuvioPay add-to-cart button will automatically change to an out of stock button when a product is out of stock.
6. Checkout Settings
Add a buy-now button to your Shopify checkout. The button will be styled to match your existing checkout components — if you change checkout styles, those changes will also apply to the checkout buy-now button.
Step 1: Open Checkout Customizer
- In Shopify Admin, navigate to Settings → Checkout and click the Customize button in the Configurations section.


Steps 2–3: Add the Extension
- On the left sidebar, click the Apps icon.
- Add the vesuvio-pay-checkout-buy-now-button checkout extension.
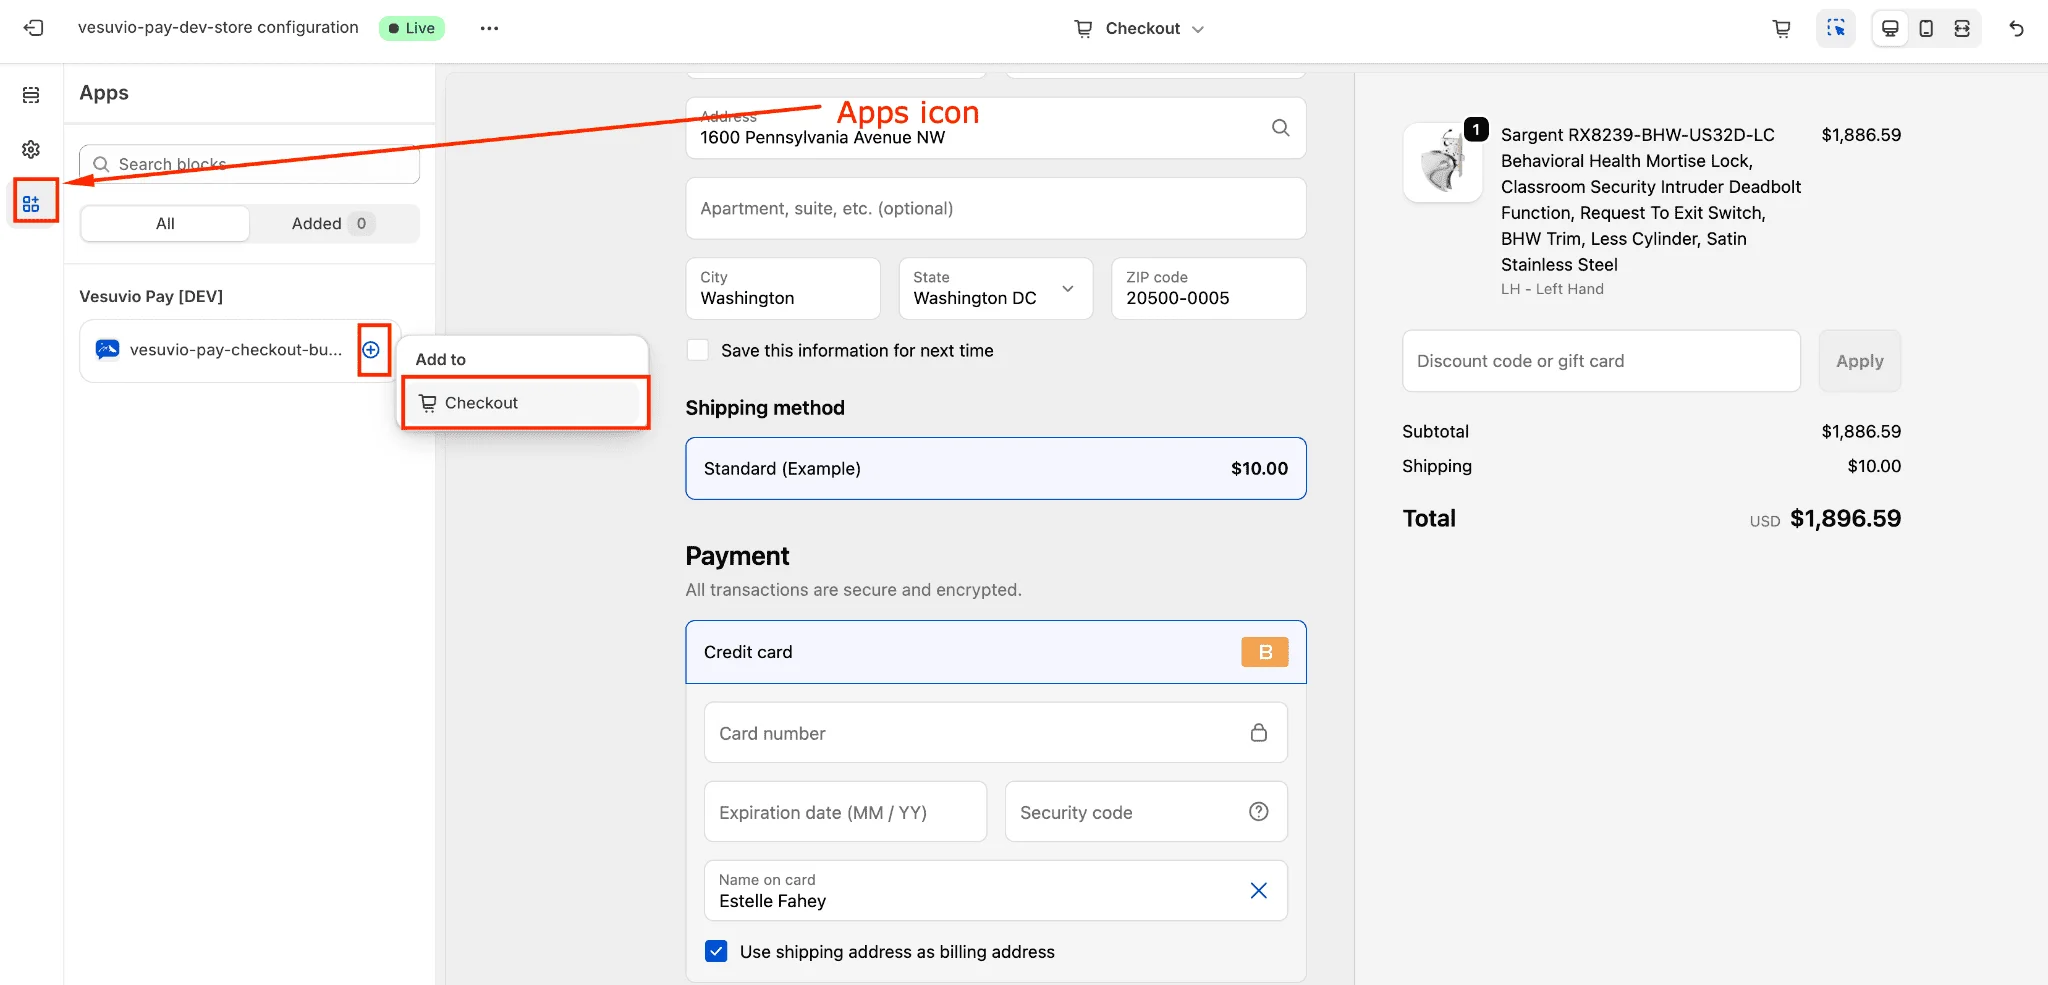
Step 4: Configure Extension Settings
- In the extension settings, enter the following (both values are available on the VesuvioPay Dashboard):
- VesuvioPay store ID
- VesuvioPay public key
- Include block in Shop Pay

Step 5: Reposition (Optional)
- Reposition the extension to your preferred location.
Step 6: Save Changes
- Save your changes.
7. Cart Drawer Integration
If your theme uses a cart drawer, you can add a VesuvioPay buy-now button directly in the cart drawer via theme code edits.
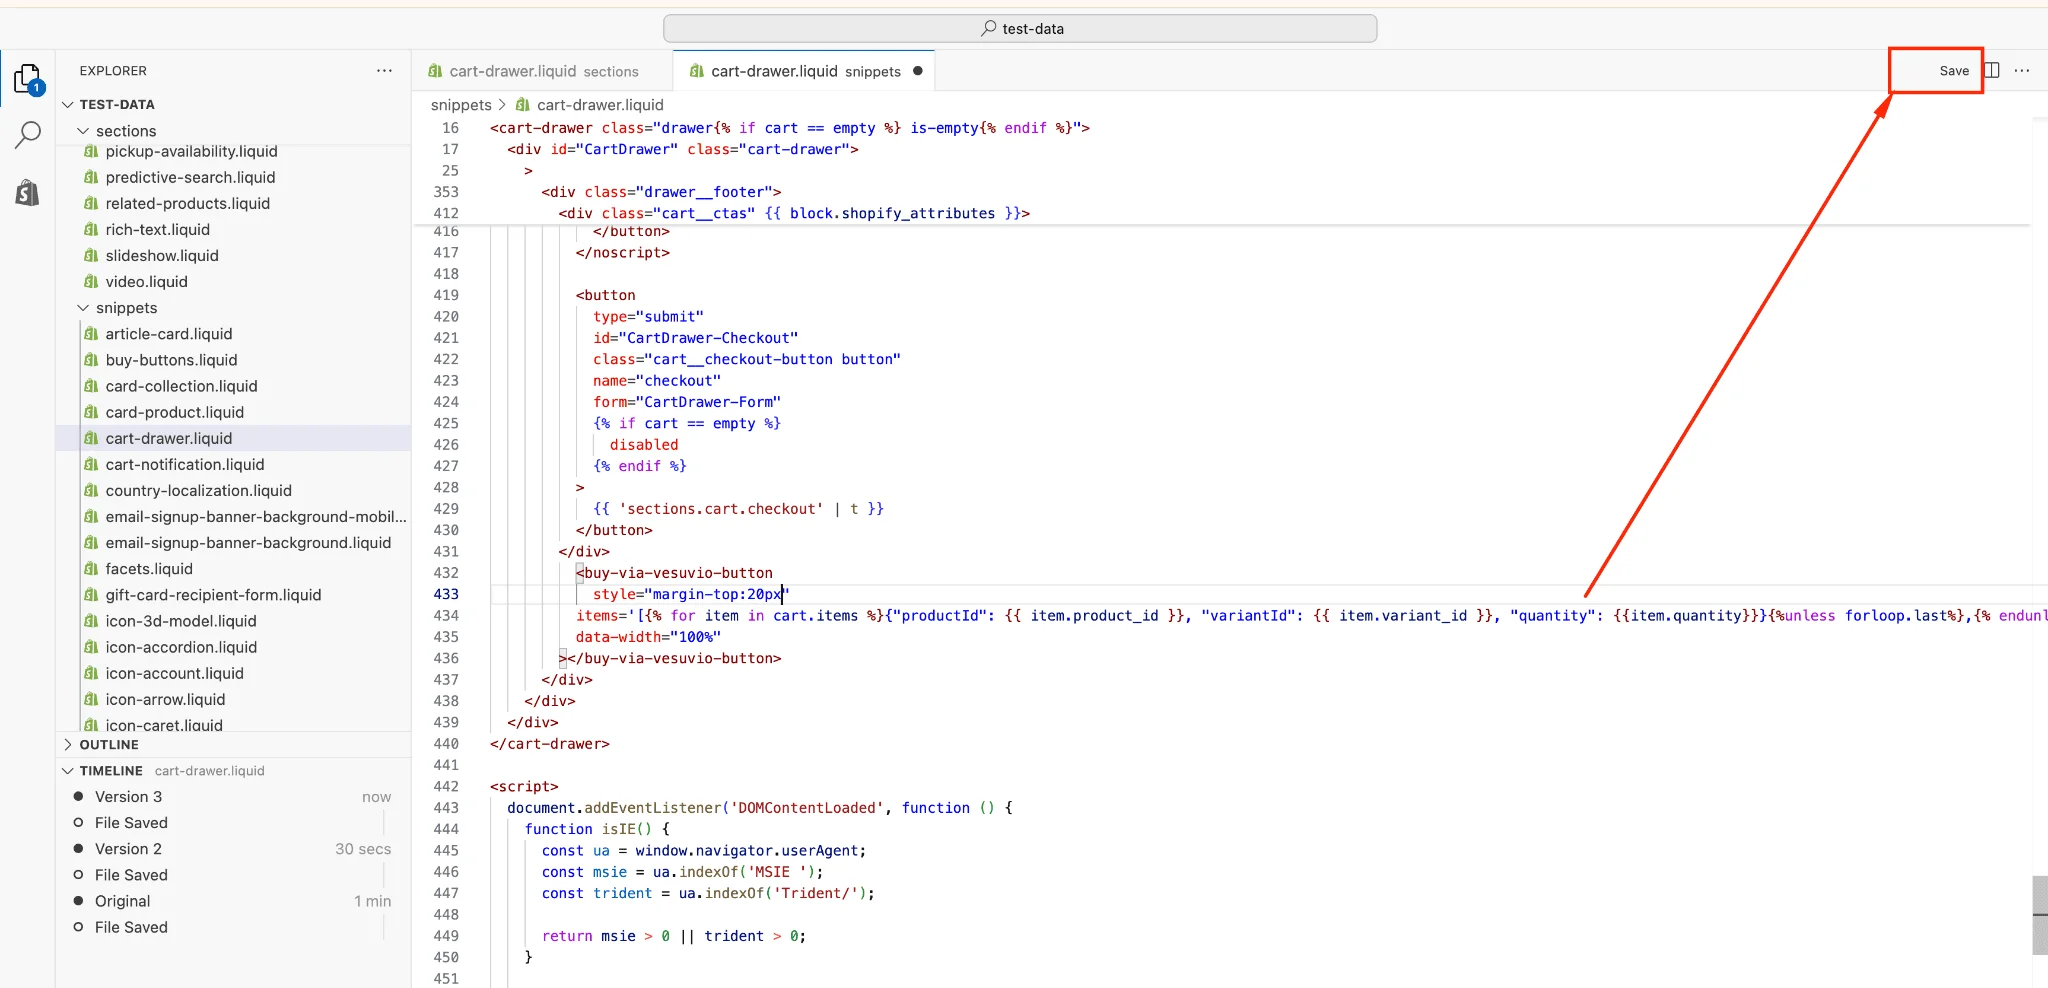
Step 1: Open Theme Code Editor
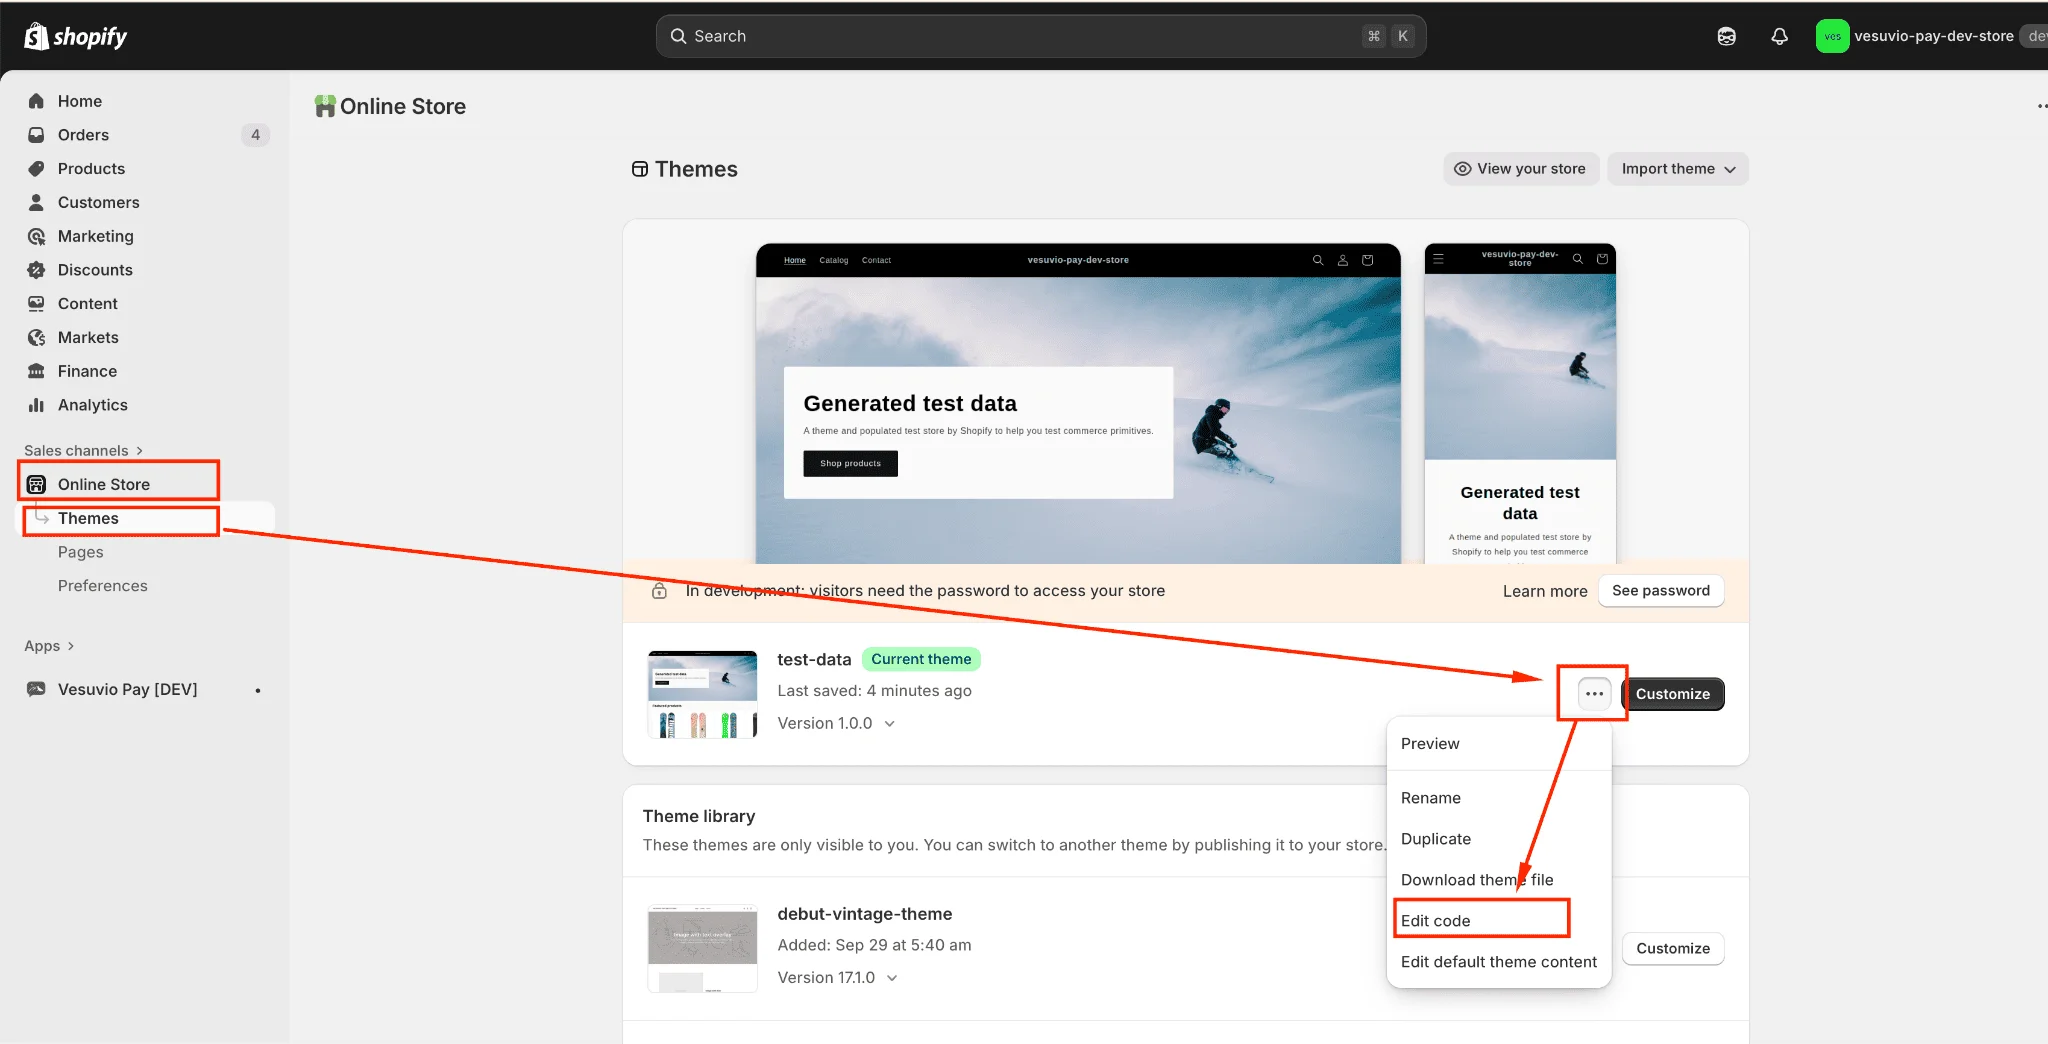
- In Shopify Admin, navigate to Sales Channels → Online Store → Themes → Edit code.
Step 2: Find the Cart Drawer File
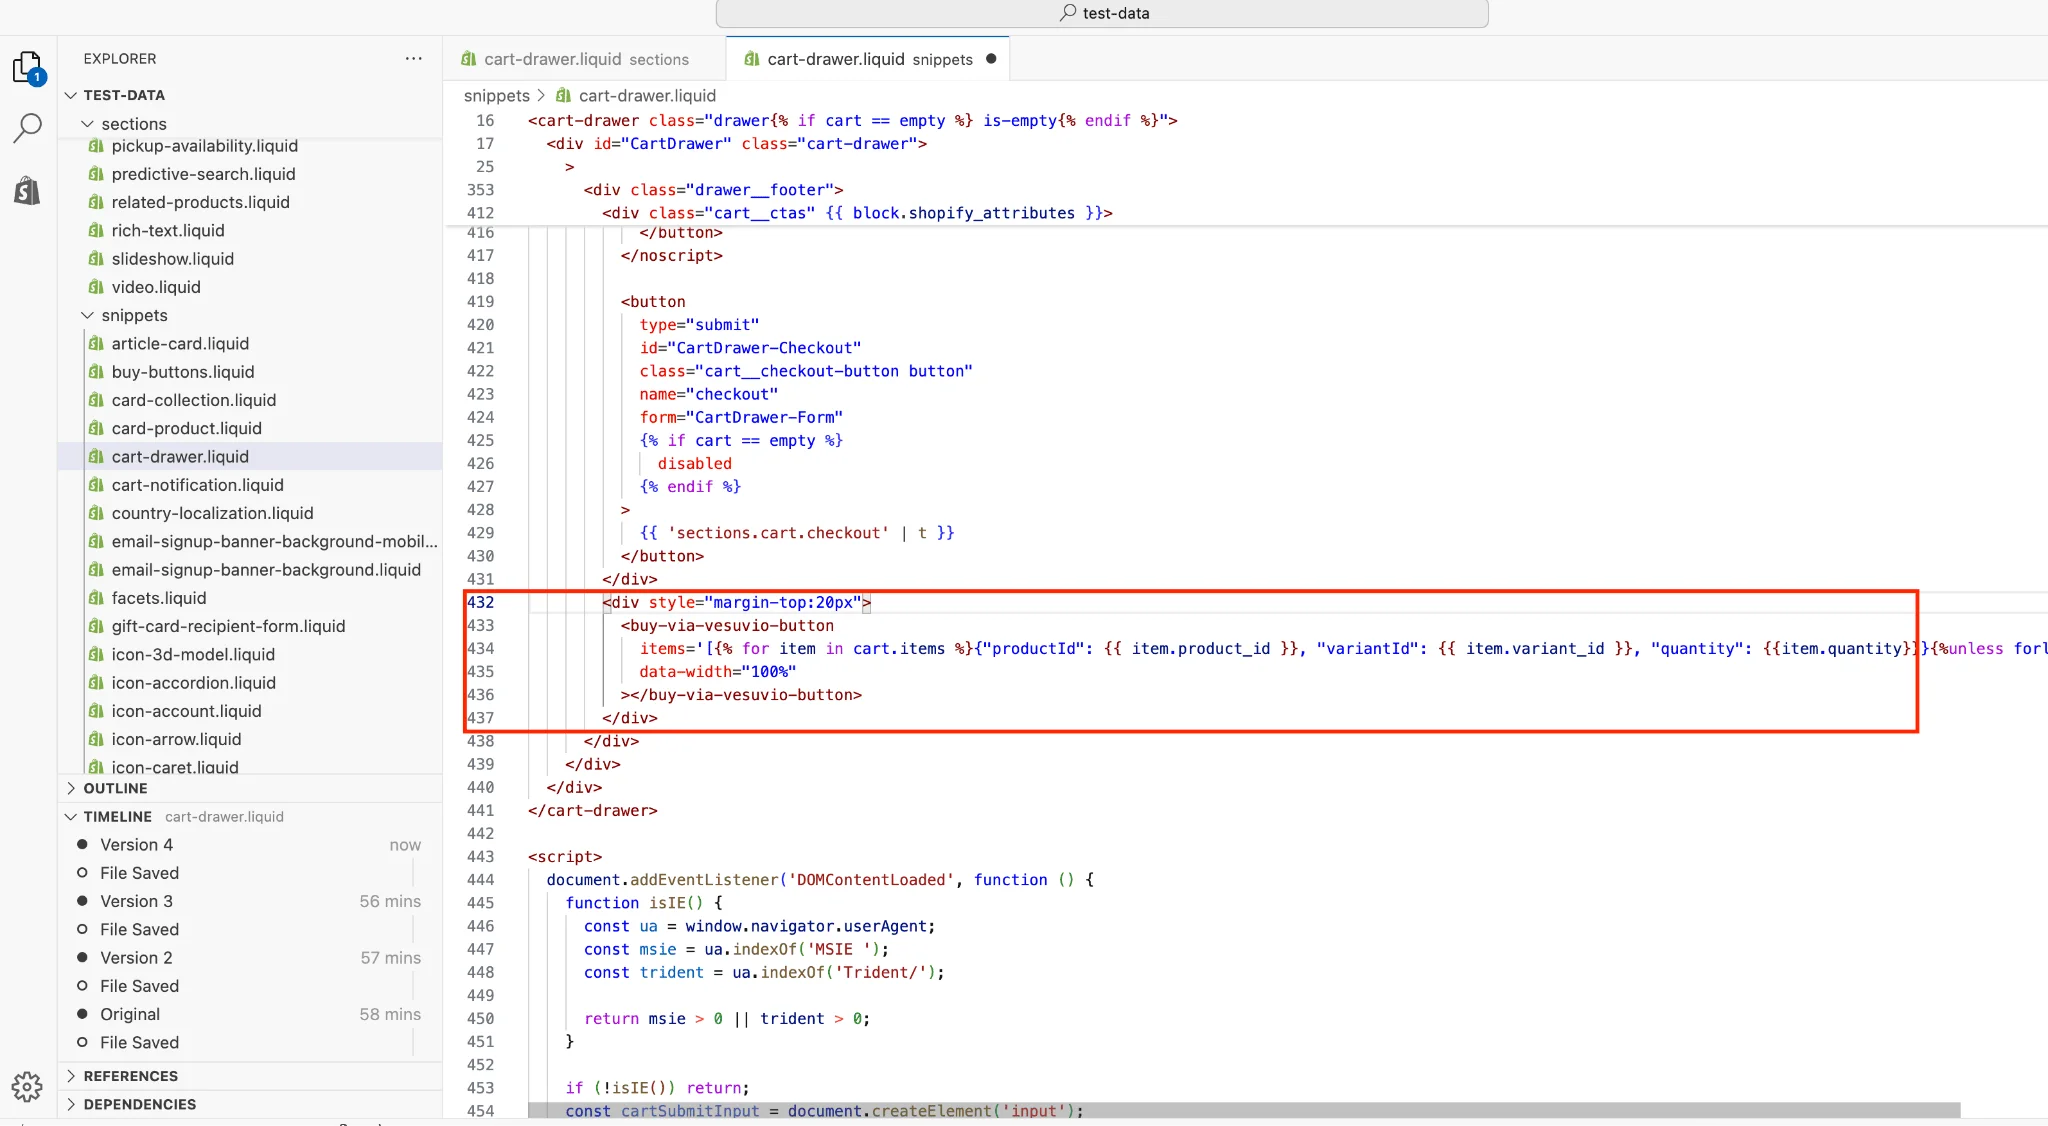
- Find the file responsible for rendering the cart drawer.
In most themes this is cart-drawer.liquid, but the file name may vary depending on your theme.

Steps 3–4: Insert the Button Code
- Insert the following code snippet where you want the buy-now button to appear.
- Optionally, apply CSS style changes. See the VesuvioPay SDK docs for
buy-via-vesuvio-buttonstyling options.
<buy-via-vesuvio-button
  items='[{% for item in cart.items %}{"productId": {{ item.product_id }}, "variantId": {{ item.variant_id }}, "quantity": {{item.quantity}}}{%unless forloop.last%},{% endunless %}{% endfor %}]'
></buy-via-vesuvio-button>
Step 5: Save Changes
- Save your changes.